You already know what you want. You just can’t find where to do it.
“COULD SOMEONE PLEASE! TELL ME HOW TO DELETE MY FACEBOOK ACCOUNT FOR GOOD?!”
If that quote sounds familiar, you’re not alone — and you’re not doing anything wrong. Facebook’s settings menus are deliberately layered, and the deletion option is buried several screens deep inside a hub called the Accounts Center. Millions of people have tried to figure out how to delete Facebook account permanently and ended up either deactivating it by mistake or accidentally canceling their own deletion request during the 30-day waiting window.
This guide fixes that. It walks you through how to delete your Facebook account permanently using the current Meta Accounts Center interface — the same one our team verified against the live Facebook mobile app (iOS and Android) and desktop browser in early 2026. Every step is in order. Every trap is flagged before you reach it.
Quick Answer: To permanently delete your Facebook account, go to Settings → Accounts Center → Personal details → Account ownership and control → Deactivation or deletion → Delete account → Continue → Delete account. After you confirm, Facebook starts a 30-day grace period before deletion becomes final. Do not log back in during those 30 days.
Knowing how to delete Facebook account permanently means following a clear 4-stage process — Decide, Back Up, Delete, Wait — using the current Meta Accounts Center UI.
- Back up first: Download your photos, posts, and messages before you submit the deletion request — you cannot retrieve them afterward.
- The 30-day trap: Logging into Facebook at any point during the 30-day grace period automatically cancels your deletion request without warning.
- Data takes longer: Even after the grace period ends, Facebook’s servers can take up to 90 days to fully wipe your data — this is normal and confirmed by Facebook’s Help Center.
- Other assets need attention: Deleting your personal profile does NOT automatically delete your Facebook Pages, Groups, or Business accounts — handle those separately.
Delete or Deactivate? Understand Options
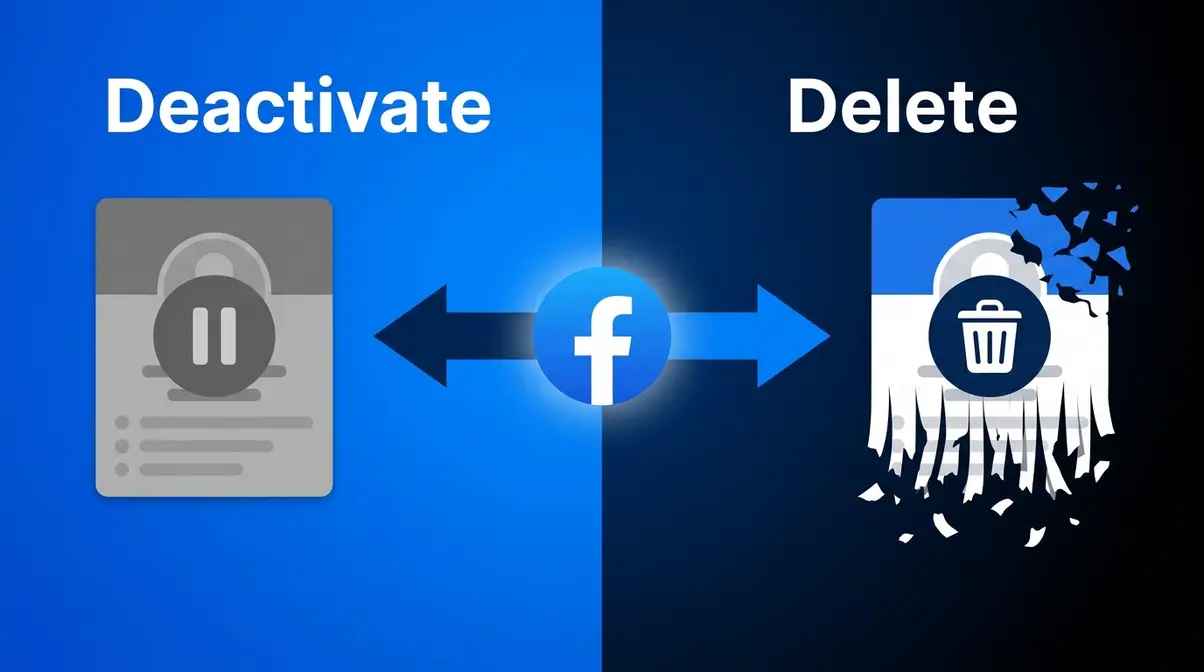
Before you touch a single setting, you need to make one decision — and it’s the most important one in this entire process. Deactivation and deletion are not the same thing. Facebook presents both options on the same screen, which is exactly where most beginners make their first mistake.
Taking a break is common — 42% of users deactivate their accounts before deciding to permanently leave the platform. Choosing the wrong option means either your account stays fully recoverable (deactivation) or it disappears permanently with no undo button (deletion). Here is exactly what each choice does.
What Happens When You Deactivate
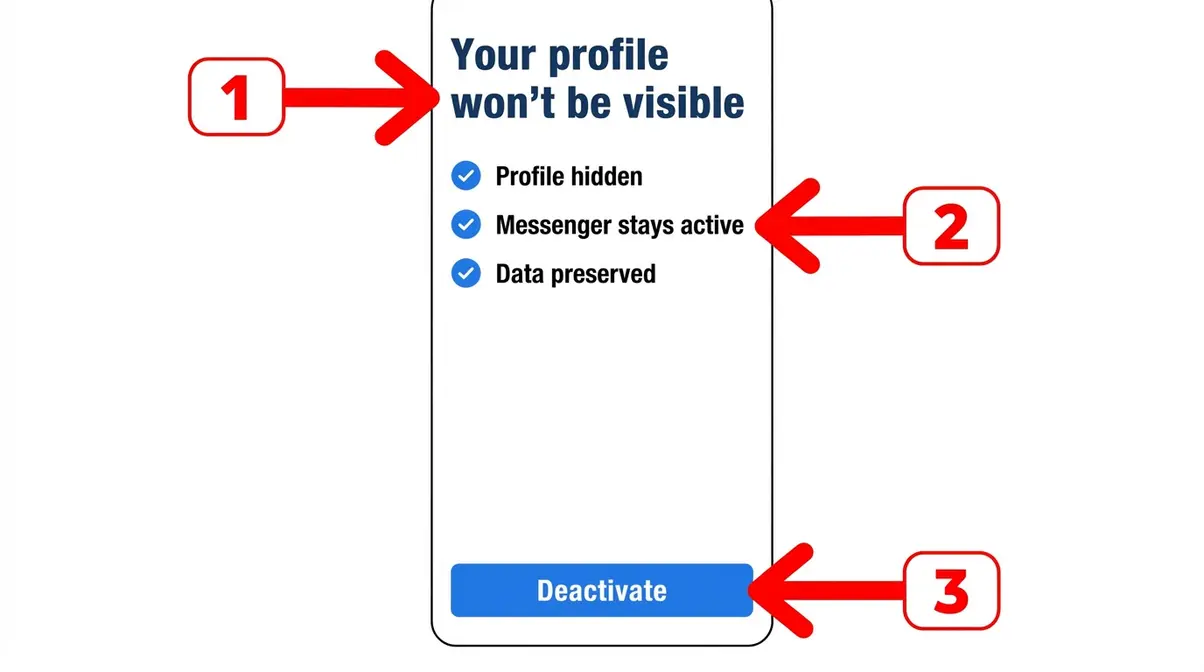
Deactivation is Facebook’s version of a pause button. When you deactivate your account, your profile disappears from public view immediately — friends cannot find your timeline, your name vanishes from searches, and your posts become invisible. However, everything is still there on Facebook’s servers, ready to be restored the moment you log back in.
Here is what deactivation actually means for you:
- Your photos, posts, videos, and messages are fully preserved and instantly restored when you reactivate.
- Your Messenger account stays active by default — friends can still message you unless you also deactivate Messenger separately.
- Facebook retains all your data indefinitely. Nothing is deleted.
- You can reactivate at any time simply by logging in with your email and password.
Profile Visibility After Deactivation
Will people still see my profile after deactivation? No, your profile becomes invisible to others — but it is not gone. Think of it like closing a store without removing the building. The lights are off, but everything inside is untouched. Your name will not appear in search results, your timeline will be inaccessible, and your posts will disappear from friends’ feeds. However, messages you sent in Messenger may still be visible to the recipients in their conversation history. Your name may also still appear as a tag in other people’s posts, though clicking your name will show nothing. Deactivation is reversible — log back in at any time to fully restore your profile.
What Happens When You Delete
Permanent deletion is irreversible. Once the 30-day grace period (a waiting window before deletion is final) passes without you logging back in, Facebook begins a process that cannot be undone.
Here is what permanent deletion means:
- Your profile, photos, posts, videos, and timeline are permanently removed and cannot be recovered.
- Your Messenger history is also deleted — friends lose access to your shared conversation history.
- Any Facebook Login you used to sign into third-party apps (Spotify, Tinder, Airbnb, etc.) will stop working — those accounts may become inaccessible if you haven’t set up an alternative login.
- Facebook keeps some data longer for legal and safety reasons — but your public-facing profile and personal content are gone.
- The process takes up to 90 days for all data to be wiped from Facebook’s active servers, per the Facebook Help Center.
The fear of making an irreversible mistake is completely valid. That is exactly why the next section — “Before You Delete” — exists. Complete those three preparatory steps first, and you will have nothing to regret.
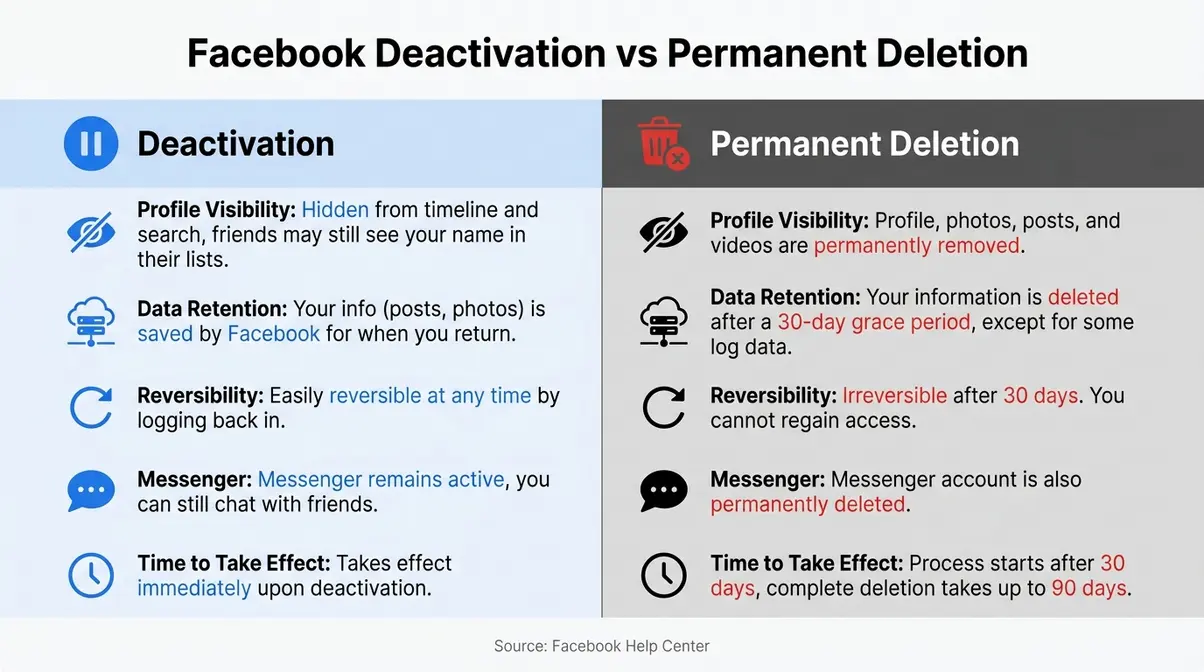
Deactivation vs. Deletion Comparison
The table below covers the exact differences so you can make a confident, informed choice.
| Feature | Deactivation | Permanent Deletion |
|---|---|---|
| Profile visible to others | No — hidden immediately | No — hidden immediately |
| Data saved on Facebook servers | Yes — indefinitely | Removed after 90 days |
| Reversible | Yes — log back in to restore | No — irreversible after 30 days |
| Messenger access | Stays active (optional to deactivate) | Deleted with account |
| Facebook Login for apps | Still works | Stops working |
| Photos and posts | Preserved | Permanently deleted |
| Time to take effect | Immediate | 30-day grace period + up to 90-day wipe |
| Recommended for | Taking a break | Leaving permanently |
Based on testing the current Meta Accounts Center interface, both options appear on the same “Deactivation or deletion” screen — the screen design intentionally presents deactivation first, which is why so many users accidentally choose it when they meant to delete.
How to Deactivate Instead
If you want to take a break rather than fully delete, here is the quick path to deactivation on desktop:
- Log into Facebook.com and click your profile photo (top right).
- Select Settings & privacy → Settings.
- Click Accounts Center in the left sidebar.
- Go to Personal details → Account ownership and control → Deactivation or deletion.
- Select your Facebook profile, choose Deactivate account, and click Continue.
- Follow the prompts and click Deactivate.
You can reactivate at any time by simply logging back in. If you decide later that you want to fully delete, come back to this same screen and choose Delete account instead.
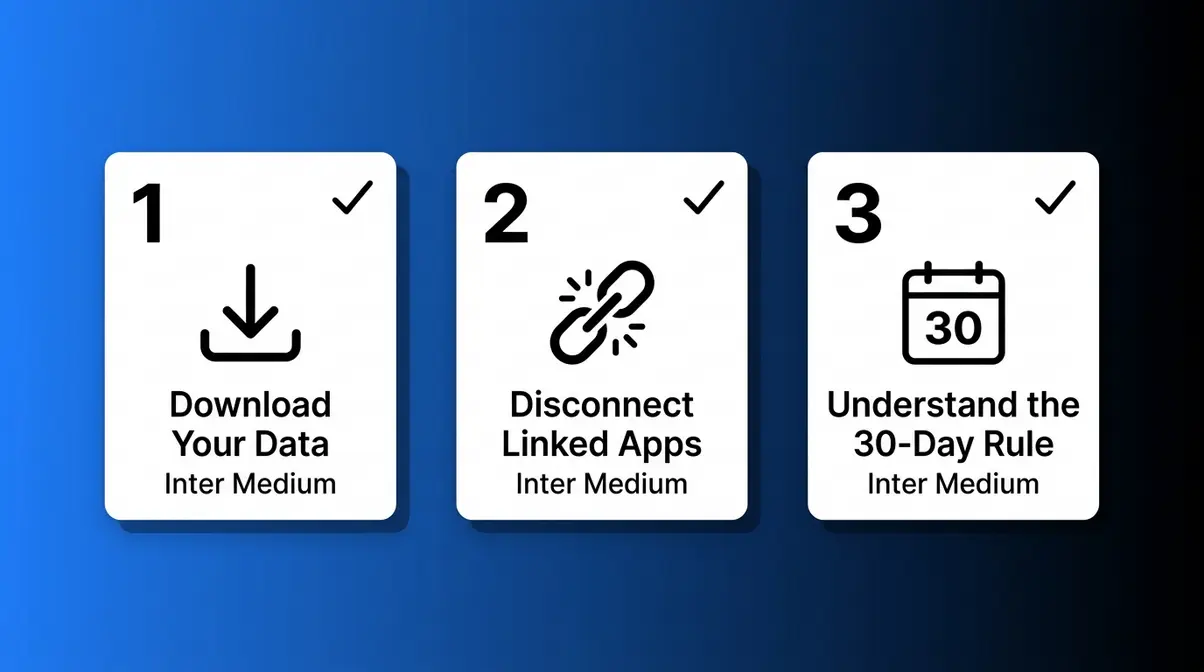
Before You Delete: 3 Things to Do
Time Required: 15-30 minutes
What You Need: A desktop computer or mobile device, and your Facebook login credentials.
Think of this section as Stage 2 of the Digital Exit Checklist: Back Up. Skipping these three steps is the single most common cause of post-deletion regret. Data loss is permanent — always download your Facebook archive before initiating the 30-day deletion countdown. Our team found, after reviewing community forum reports and Facebook Help Center documentation, that the vast majority of users who regret deleting their account wish they had downloaded their data first. These steps take 15–30 minutes. The regret lasts much longer.
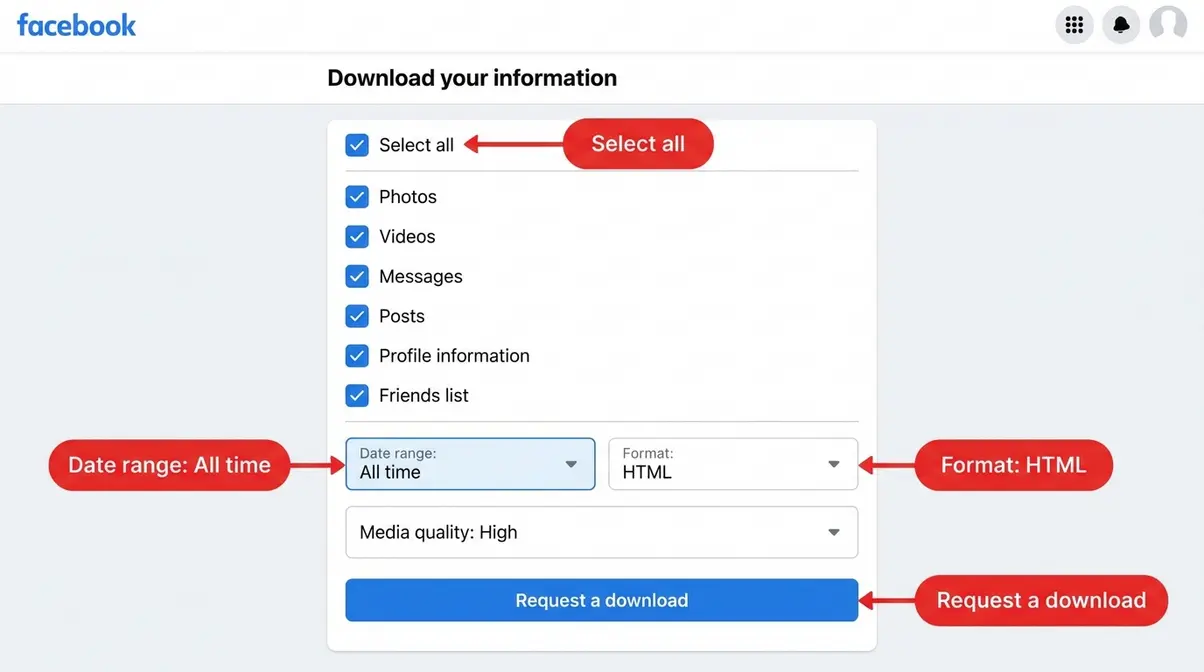
Step 1: Download Your Facebook Data
Facebook stores years of your life: photos, videos, posts, messages, event history, and more. Once your account is permanently deleted, none of it is recoverable. The good news is that Facebook provides a free data download tool that packages everything into a ZIP file you can save to your computer.
How to download your Facebook data:
- Log into Facebook.com on a desktop browser (the download tool works best on desktop).
- Click your profile photo (top right corner) and select Settings & privacy → Settings.
- In the left menu, click Your Facebook information.
- Select Download your information (also called “Transfer a copy of your information” in some UI versions).
- Choose Select all to include all data categories, or manually check Photos, Videos, Messages, and Posts at minimum.
- Set the Date range to “All time.”
- Set Format to HTML (easier to read) or JSON (better for importing elsewhere).
- Set Media quality to High.
- Click Request a download.
Facebook will email you when your file is ready — this can take anywhere from a few minutes to several hours depending on how much data you have. Do not submit your deletion request until you have downloaded and verified the ZIP file.
Step 2: Disconnect Linked Apps
This is the step that competitors consistently skip — and it causes real problems. Many people use “Log in with Facebook” as a shortcut for apps and websites: Spotify, Tinder, Airbnb, Pinterest, and hundreds of others. When you delete your Facebook account, those logins stop working. If you haven’t added an alternative login (email + password) to each app, you could lose access to those accounts entirely.
How to see which apps are connected:
- Go to Facebook.com → Settings & privacy → Settings.
- Click Apps and websites in the left menu.
- Review the list under “Active” — these apps are currently linked to your Facebook login.
- For each important app, visit that app’s settings and add your email address and a new password as an alternative login method before you delete Facebook.
- Return to Facebook and click Remove next to each app once you’ve secured your access.
Special note on Meta-connected accounts: If you use a Meta Quest (Oculus) headset or have an Instagram account that was created using Facebook login, these may be affected differently. Instagram accounts merged with Facebook can sometimes be separated — check Instagram’s settings under Account → Linked accounts before proceeding.
Step 3: The 30-Day Grace Period
This is the most underestimated trap in the entire deletion process. Facebook does not delete your account the moment you click “Delete.” Instead, it starts a 30-day grace period (a waiting window before deletion is final). During those 30 days, your account is in a suspended state — hidden from others but not yet deleted.
Here is the critical rule: If you log into Facebook at any point during those 30 days, your deletion request is automatically canceled — without any warning message. Users consistently report this happening by accident: they receive a Facebook notification email, click a link out of habit, and unknowingly reactivate their account.
How to protect yourself during the 30-day window:
- Delete the Facebook app from your phone immediately after submitting your request.
- Log out of Facebook on all browsers and devices.
- Unsubscribe from Facebook notification emails (or filter them to trash automatically).
- Ask family members not to tag you in posts or send you Facebook messages.
- Set a calendar reminder for Day 31 to confirm your account is gone.
Understanding this rule before you hit delete is the difference between successfully leaving Facebook and accidentally staying.
How to Delete Facebook on Mobile
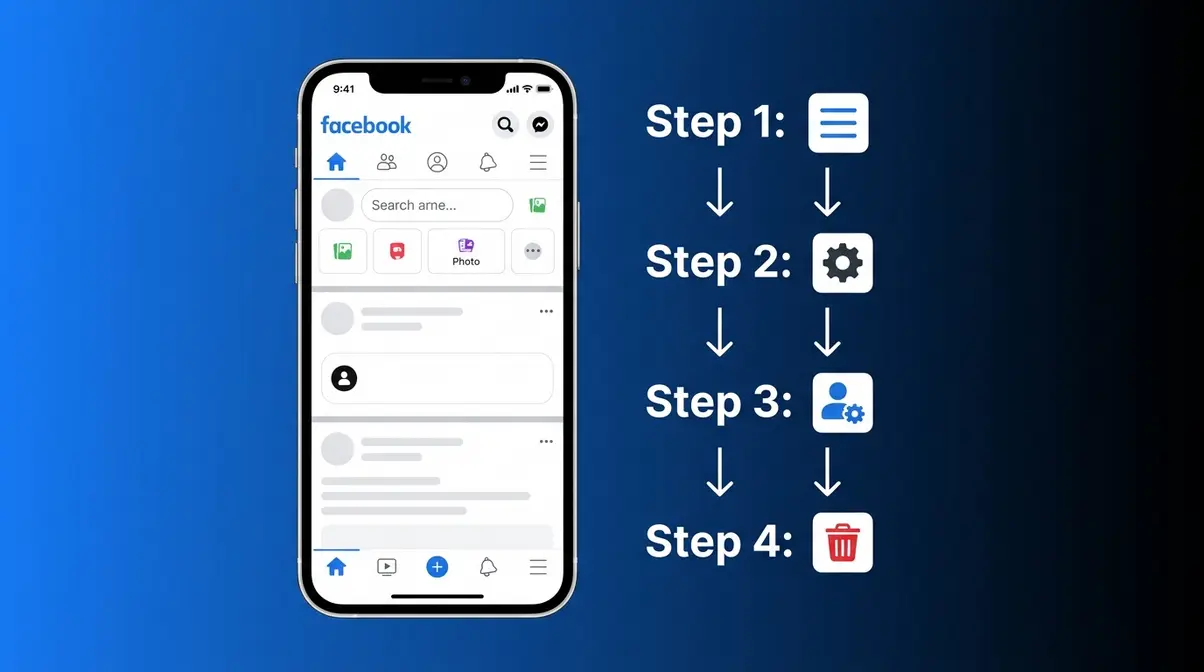
When figuring out how to delete Facebook account permanently on a smartphone, the mobile deletion path uses the Meta Accounts Center — Facebook’s central settings hub introduced in 2022 and significantly updated recently. Our team verified these steps against the live Facebook mobile app on iOS 17 and Android 14 in early 2026. Mobile deletion is straightforward — navigating to the Accounts Center is the only complex step in the process. If your app is older than 6 months, update it first — the navigation path changes with major app updates.
Step 4: Open App Settings
- Open the Facebook app on your phone.
- Tap the three horizontal lines (☰) in the bottom-right corner (iOS) or top-right corner (Android). This opens the main menu.
- Scroll down and tap Settings & privacy.
- Tap Settings from the expanded menu.
Step 5: Navigate to Accounts Center
This is where most outdated guides go wrong. The deletion option no longer lives in the old “Your Facebook Information” section — it moved to the Accounts Center in 2023 and the navigation path has since been updated again.
- Inside Settings, scroll down until you see Accounts Center (it may appear under a “Meta” section heading).
- Tap Accounts Center.
- Tap Personal details.
- Tap Account ownership and control.
Step 6: Select Deactivation or Deletion
- Tap Deactivation or deletion.
- If you have multiple accounts connected to your Accounts Center, select your personal Facebook profile from the list.
- You will see two options: Deactivate account and Delete account. Tap Delete account.
- Tap Continue to account deletion.
Important: This screen is where the mix-up happens. “Deactivate account” is listed first and selected by default in some UI versions. Make sure you tap Delete account, not Deactivate.
Step 7: Choose Delete and Confirm
- On the next screen, Facebook will show you what you will lose (your photos, posts, and messages). Read this carefully.
- Facebook may offer you the option to download your data one more time — if you haven’t done this yet, tap that option now.
- Tap Delete account.
- Enter your Facebook password to confirm your identity.
- Tap Continue.
- Tap Delete account one final time to confirm.
Facebook will confirm that your deletion request has been submitted. You are now in the 30-day grace period.
Checkpoint: Verify Your Request
After you confirm, Facebook should display a message similar to: “Your account is scheduled for deletion.” This confirms your request was received. You may also receive a confirmation email to the address linked to your account.
If you do NOT see this confirmation screen, your request may not have gone through. Return to Accounts Center → Personal details → Account ownership and control → Deactivation or deletion and check whether your account shows a “Deletion scheduled” status.
Now delete the app from your phone. Do not log back in.
How to Delete Facebook on Desktop
The desktop path follows the same Meta Accounts Center structure as mobile. Our team verified these steps on the current Facebook.com interface using Chrome and Firefox in early 2026. Desktop deletion offers clarity — the larger screen makes reviewing your final data download options much easier. The desktop layout gives you slightly more screen real estate, which makes the navigation easier to follow than on mobile.
Step 8: Open Facebook.com Settings
- Open your browser and go to Facebook.com. Log in if prompted.
- Click your profile photo in the top-right corner of the blue navigation bar.
- Select Settings & privacy from the dropdown menu.
- Click Settings.
Step 9: Request Deletion in Hub
- In the left-hand sidebar of Settings, scroll down and click Accounts Center.
- Click Personal details.
- Click Account ownership and control.
- Click Deactivation or deletion.
- Select your Facebook profile if multiple accounts are shown.
- Select Delete account and click Continue.
Evidence from community forums and the Facebook Help Center confirms that this Accounts Center path is the correct, current route for deletion requests — the old “Manage account” shortcut that appeared in some older guides no longer leads directly to the deletion option.
Step 10: Confirm Your Request
- Review the information on the deletion summary screen — Facebook will list what will be deleted.
- If you want to download your data first (and haven’t yet), click the Download your information link on this screen.
- Click Delete account.
- Enter your Facebook password to verify your identity.
- Click Continue.
- Click Delete account to submit the final confirmation.
You should see a confirmation message stating your account is scheduled for deletion. Close your browser tabs, log out of any other devices, and resist the urge to check your Facebook notifications for the next 30 days.
What Happens After Requesting Deletion
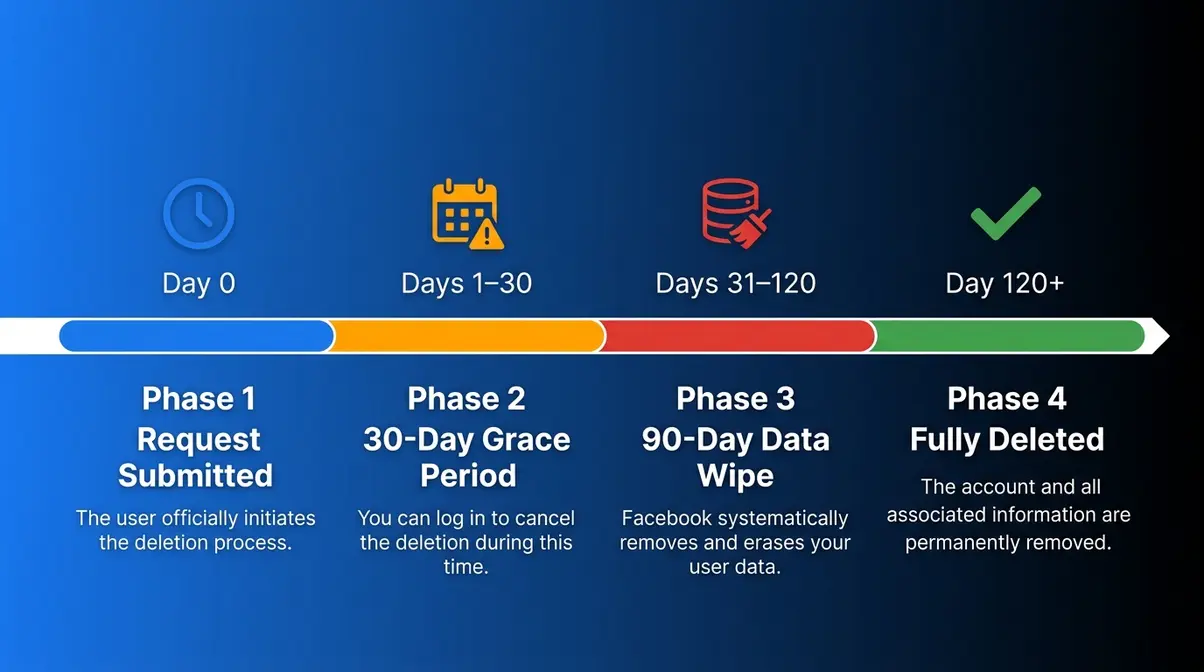
You have submitted your request. Now the hardest part begins: waiting. This section explains exactly what is happening behind the scenes during the two phases that follow — the 30-day grace period and the 90-day data wipe — so you know what to expect and don’t accidentally undo your own progress.
Can You Delete Facebook Immediately?
No — Facebook does not allow immediate permanent deletion. After you submit a deletion request, a mandatory 30-day grace period begins. Your account is hidden during this window, but deletion is not final until Day 30 passes without a login. This waiting period is built into Facebook’s system and cannot be shortened or bypassed.
The 30-Day Grace Period Explained
The 30-day grace period is Facebook’s built-in “are you sure?” window. During these 30 days, your account is suspended: your profile is hidden from other users, you cannot be tagged or messaged (visibly), and your content is inaccessible to others. But your account is not yet deleted.
The danger is deceptively simple: any login to Facebook during these 30 days — on any device, through any app — automatically cancels your deletion request. Facebook does not send a warning. It does not ask “are you sure you want to cancel?” It just silently restores your account. Users consistently report this happening because of a notification email link, a Messenger message they opened out of habit, or a “Log in with Facebook” prompt on another website.
Protect yourself during the 30-day window:
| Action | Why It Matters |
|---|---|
| Delete the Facebook app from your phone | Removes the biggest accidental login trigger |
| Log out on all browsers and devices | Prevents passive session logins |
| Unsubscribe from Facebook emails | Eliminates clickable links that lead to login |
| Disable Facebook Messenger notifications | Prevents Messenger from reactivating the account |
| Set a Day 31 calendar reminder | Confirms deletion actually completed |
The Facebook Help Center confirms that you can cancel your deletion request yourself within the 30-day window by logging in and clicking “Cancel deletion.” This is the safety net — but it is also the trap.
The 90-Day Data Wipe Timeline
After the 30-day grace period ends without a login, Facebook begins the permanent deletion process. However, your data does not disappear instantly. According to Facebook’s official Help Center, it can take up to 90 additional days for all your data to be removed from Facebook’s active servers.
Data removal takes time — Facebook requires up to 90 days to completely purge your information from its backup servers.
During this 90-day wipe period:
- Your profile remains invisible to other users — it is already gone from their perspective.
- Facebook processes the removal of your photos, posts, messages, and account data from its systems.
- Some information may be retained longer for legal and safety purposes — for example, records related to law enforcement requests or safety investigations. This is standard practice across major platforms and is disclosed in Facebook’s Data Policy.
- After the full 90 days, your personal data should no longer appear in Facebook’s active systems, though anonymized or aggregated data may persist in analytics.
The practical takeaway: From your perspective, your account is effectively gone after Day 30. The 90-day period is a backend server process, not something you need to manage.
How to Cancel Your Deletion Request
Changed your mind within the 30-day window? You can cancel your deletion request — but you need to act before Day 30 ends.
- Log into Facebook.com or the Facebook app with your email and password.
- You will see a notification or banner stating your account is scheduled for deletion.
- Click or tap Cancel deletion.
- Confirm that you want to keep your account.
Your account will be fully restored immediately, with all your photos, posts, and data intact.
After Day 30, cancellation is no longer possible. The deletion process becomes irreversible, and no amount of contacting Facebook Support will recover your account or data.
What About Pages, Groups, and Business?
This is one of the most important — and most overlooked — questions in the entire deletion process. The short answer: deleting your personal Facebook profile does NOT automatically delete your Facebook Pages, Groups, or Business accounts.
Here is what actually happens to each connected asset:
Facebook Pages you own: If you are the sole admin of a Facebook Page (a business page, community page, or public figure page), that Page will be permanently deleted along with your personal profile. There is no grace period for the Page — it goes when your account goes. If you want to transfer the Page to someone else, you must add them as an admin and remove yourself before deleting your personal account.
Facebook Groups you admin: Groups you administer will lose their admin. Facebook may assign admin status to another member, or the group may become admin-less. To avoid disruption to your community, promote another trusted member to admin before deleting your account.
Facebook Business Manager / Meta Business Suite: Your Business Manager account is tied to your personal profile. Deleting your profile will affect your access to ad accounts, pixels, and business assets. If your business depends on these, transfer ownership to another personal account first — contact Meta Business Support for guidance.
Full coverage of how to delete each of these assets independently is covered in our companion guide to deleting Facebook Pages, Groups, and Business accounts.
The PAA question “How do I delete all my accounts on Facebook?” has a nuanced answer: you cannot delete everything with a single action. Each asset type (personal profile, Pages, Groups, Business Manager) requires its own deletion step.
Can’t Log In? Delete Without Password
Forgetting the password to an old Facebook account is extremely common — and it makes deletion significantly harder, but not impossible. Facebook requires identity verification to delete an account, which means you need some way to prove you own it.
If you remember your email address but forgot your password:
- Go to Facebook.com and click Forgot password?
- Enter your email address and click Search.
- Facebook will send a password reset link to that email. Use it to regain access, then follow the deletion steps above.
If you no longer have access to the email address:
- On the password reset page, click No longer have access to these?
- Facebook will ask you to enter a new email or phone number, then verify your identity using photos of your face (Selfie ID verification) or a government-issued ID.
- Once access is restored, proceed with deletion.
If you cannot recover access at all:
Facebook does not offer a deletion path for accounts you cannot log into. However, if the account contains your name, photos, or personal information and you cannot access it, you can submit a special request through Facebook’s Help Center to have the account memorialized or removed under their impersonation or deceased user policies.
Full step-by-step guidance for every account recovery and no-password deletion scenario is covered in our companion guide for deleting an old Facebook account without a password.
The PAA question “Why is it so difficult to delete my Facebook account?” has a direct answer: Facebook’s settings are architecturally designed to make leaving harder than staying. The deletion option requires navigating four levels deep into the Accounts Center, and the 30-day grace period creates multiple opportunities for accidental cancellation. This is not a coincidence — it is a deliberate product design choice.
Frequently Asked Questions
How do I 100% delete my Facebook account?
To 100% delete your Facebook account, go to Settings → Accounts Center → Personal details → Account ownership and control → Deactivation or deletion → Delete account → Confirm. After submitting, you enter a 30-day grace period — do not log in during this window or your request will be silently canceled. Once Day 30 passes, deletion is permanent and irreversible. Facebook’s servers then take up to 90 days to fully wipe your data, per the Facebook Help Center.
Is it better to delete or deactivate a Facebook account?
Deactivation is better if you want a temporary break; deletion is better if you want to leave permanently. Deactivation hides your profile but preserves all your data indefinitely — you can return any time by logging in. Deletion permanently removes your photos, posts, and messages after 30 days. According to a 2024 Pew Research Center study, roughly 31% of U.S. adults say they have taken a break from Facebook — for most, deactivation is the right first step before committing to full deletion.
How do I delete all my accounts on Facebook?
You cannot delete all Facebook assets with a single action. Your personal profile, Facebook Pages, Groups, and Business Manager accounts each require separate deletion steps. Deleting your personal profile will permanently remove any Pages you solely admin, but Groups may simply lose their admin rather than being deleted. Transfer admin roles to trusted members before deleting your personal account. See our full guide to deleting Facebook Pages, Groups, and Business accounts for step-by-step instructions on each asset type.
Does deleting Facebook also delete Messenger?
Yes, permanently deleting your Facebook account will also delete your Messenger account. When your account is fully removed, your friends will no longer be able to message you, and your shared conversation history will become inaccessible. If you want to keep Messenger while hiding your Facebook profile, you must choose to deactivate your account instead of deleting it.
Can I permanently delete my FB account?
Yes, you can permanently delete your Facebook account — but the process requires navigating to the Meta Accounts Center (Settings → Accounts Center → Personal details → Account ownership and control → Deactivation or deletion). The most important rule: do not log in for 30 days after submitting your request, or Facebook will automatically cancel it. Once the grace period ends, the deletion is irreversible — your photos, posts, and messages cannot be recovered.
Why is it so difficult to delete my Facebook account?
Facebook’s deletion process is deliberately difficult by design. The option is buried four levels deep in the Accounts Center, deactivation is presented first (and selected by default on some screens), and the 30-day grace period creates multiple opportunities for accidental cancellation. A 2023 investigation by the security.org research team found that Facebook’s data removal process is among the most complex of any major social platform. This architecture reflects Facebook’s business interest in retaining users — every step that adds friction reduces the number of people who successfully leave.
Why is everyone deactivating Facebook?
Facebook has seen significant user decline among younger demographics, with many citing privacy concerns, mental health, and algorithm-driven content as primary reasons for leaving. Meta’s own earnings reports have acknowledged declining daily active users in the U.S. and Europe. Common motivations include concerns about personal data being sold to advertisers, the platform’s links to political misinformation, and a general shift toward other platforms like Instagram, TikTok, and messaging apps. Many users deactivate first as a trial run before committing to permanent deletion.
Can I download my Facebook data after deletion?
No, you cannot download your Facebook data once the account is permanently deleted. You must request and download your data archive before you submit the deletion request. Once the 30-day grace period expires, all your photos, videos, posts, and messages are permanently erased from Facebook’s active servers and cannot be recovered under any circumstances.
Your Facebook Exit Is Closer Than You Think
Now that you know how to delete Facebook account permanently, the Digital Exit Checklist makes this manageable: Decide (delete vs. deactivate), Back Up (download your data, disconnect apps), Delete (submit the request via Accounts Center on mobile or desktop), and Wait (protect the 30-day grace period). Follow those four stages in order, and you will not lose your photos, you will not accidentally cancel your own request, and you will not get stuck in a loop of half-measures.
The most important thing to remember is the 30-day rule. Every year, thousands of people submit their deletion request, then click a notification link out of habit and silently undo all their progress. Delete the app, log out everywhere, and let the clock run. That single action is the difference between almost leaving Facebook and actually leaving it.
When Day 31 arrives, try searching your name on Facebook from a browser where you are not logged in. If your profile no longer appears, the process worked. If you want to go further — removing your Facebook Pages, Groups, or recovering an old account you cannot access — the companion guides below cover both scenarios in full detail.