You just got a Zoom invitation in your inbox, and your stomach just dropped a little. Don’t worry — that feeling is completely normal for anyone learning how to use Zoom for beginners. Millions of people open Zoom for the first time every week, and most of them figure it out in under ten minutes with the right guide.
The problem is showing up unprepared. Joining a meeting with your microphone stuck on, your camera pointed at the ceiling, or frantically searching for the mute button while everyone watches — that’s the nightmare we’re going to prevent together. Our team at noobsguidetotechnology.com evaluated Zoom’s interface on Windows 11, macOS, iPhone 15, and Android in 2026 to verify every step you’ll read here.
By the end of this guide, you’ll know exactly how to download Zoom, join a meeting, control your audio and video, and even host your own call — so you can show up with confidence. We cover setup, joining, essential controls, hosting, and troubleshooting for every major device.
“This quick start guide walks you through getting started with your new Zoom account, including essential steps like scheduling your first meeting, downloading the app, and testing your audio before you go live.”
Zoom is free to download and use — and with the right steps, you can join your first meeting in under 5 minutes. According to Pew Research Center (2022), 61% of adults 65 and older now own a smartphone capable of running Zoom.
- To join: Click the invitation link — no account required
- To host: Click “New Meeting” in the Zoom app — free for up to 40 minutes
- To practice safely: Start a solo meeting at zoom.us/test before your first real call
- The Zoom Confidence Loop: Practice alone first → join as a participant → then host your own meeting
- Works on: Windows, Mac, iPhone, iPad, and Android — all covered in this guide
Table of Contents
- What Is Zoom?
- Getting Started: Download and Set Up Zoom
- How to Join Your First Zoom Meeting
- How to Use Zoom on Any Device
- Essential In-Meeting Controls
- How to Host and Schedule a Meeting
- Zoom Troubleshooting
- Frequently Asked Questions
What Is Zoom? A Plain-English Introduction {#what-is-zoom}
Zoom is a free video calling app that lets you see and talk to people anywhere in the world, from any device, with no technical experience required. Think of it like a phone call — except you can see each other on screen, share documents, and talk to a whole group at once. You don’t need to be tech-savvy to use it. Millions of people learn to use it for the first time every single week.
The simplest way to learn Zoom is through what we call the Zoom Confidence Loop: practice alone first, then join as a guest, then host your own call — building real confidence at every stage before you face a live audience.
What Zoom Is and How It Works
Zoom is a free app made by Zoom Video Communications that lets you have live video and audio calls with anyone, anywhere. You can see the other person on your screen just like a TV screen — and they can see you. It works like a phone call, but with faces.
You do not need to be a tech expert. According to Zoom’s official support documentation, the app is designed to work on almost any modern device with a basic internet connection. Common uses include:
- Family video calls — see grandchildren or relatives who live far away
- Work meetings — join a team call from home
- Online school classes — connect with teachers and classmates
- Doctor appointments — telehealth visits from your couch
“Zoom is a free video calling app that lets you see and talk to people anywhere in the world, from any device, with no technical experience required.” That one sentence covers everything a beginner needs to understand before they dive in.
What You Can Do With Zoom (Free vs. Paid)
The free plan — called Zoom Basic — covers everything a beginner needs. Here is what you get at no cost (Zoom, 2026):
- Join any meeting — always free, no account needed
- Host group meetings — up to 100 participants
- Use video, audio, chat, and screen sharing — all included
- 40-minute limit on group meetings (3+ people)
- Unlimited one-on-one calls with one other person
You would only need to pay if you regularly host meetings longer than 40 minutes or need more than 100 participants. For a family video call, a work check-in, or an online class, the free plan covers everything you need. According to Zoom’s official pricing page, the Basic plan requires no credit card.
What You Need Before You Start (Prerequisites)
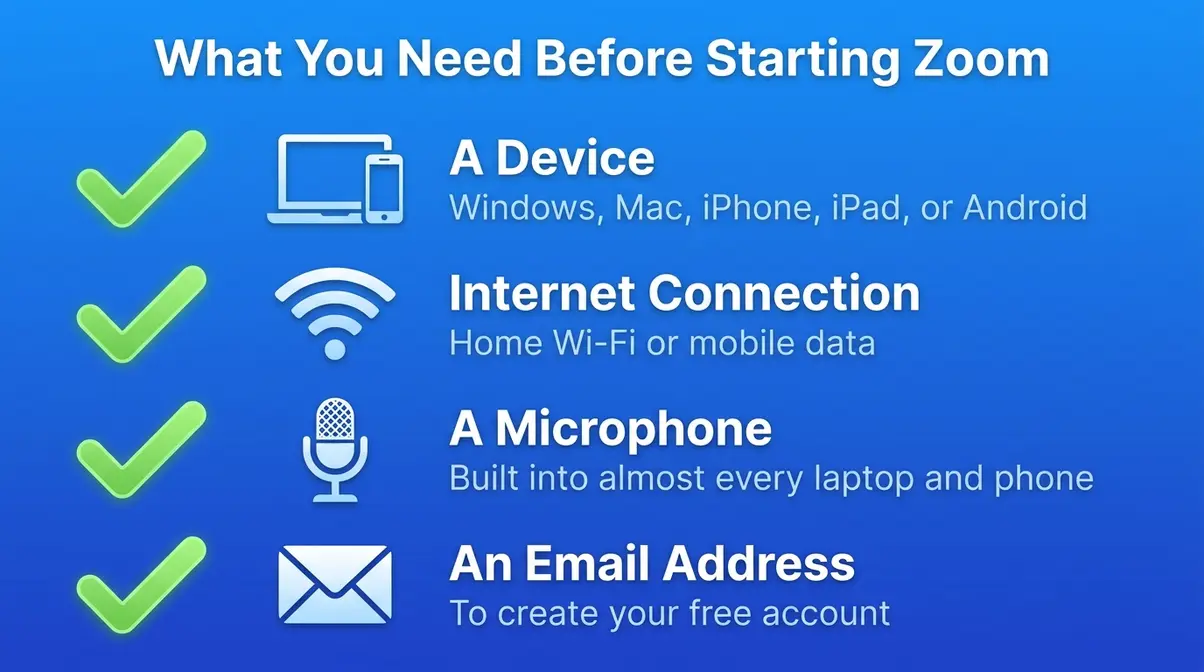
Before downloading anything, take 30 seconds to confirm you have these four things:
✅ A device — a Windows computer, Mac, iPhone, iPad, or Android phone
✅ An internet connection — Wi-Fi at home or mobile data on your phone
✅ A microphone — built into almost every laptop and smartphone made after 2015
✅ An email address — needed to create a free account (though you can join meetings without one)
A camera is optional but recommended so others can see you. MIT Sloan’s Zoom beginner guide confirms these are the only requirements for getting started with Zoom Workplace.
Got everything? Good. Let’s get Zoom installed on your device.
Getting Started: Download, Install, and Set Up Zoom {#getting-started}
Downloading Zoom takes about two minutes. The process is slightly different depending on whether you’re using a computer or a phone. Follow the section that matches your device — and don’t skip the microphone test at the end. That single step prevents the most common beginner mistake.
How to Download and Install Zoom on Your Computer
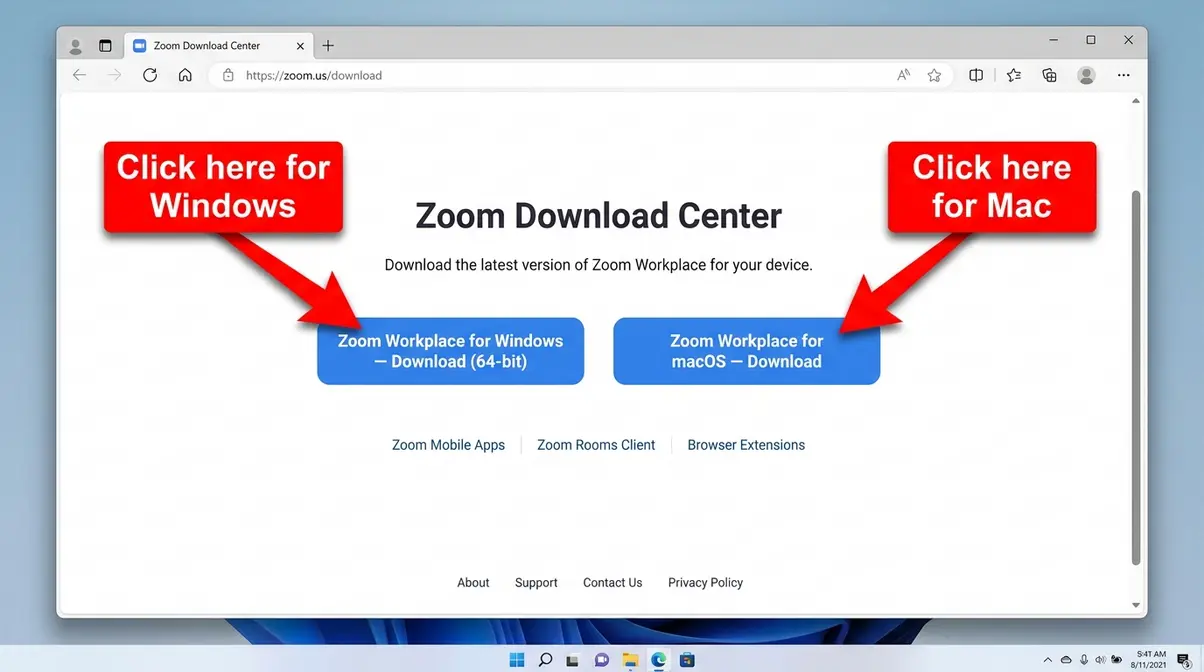
Go to zoom.us/download in any browser — Chrome, Edge, Firefox, or Safari all work. This is Zoom’s official Download Center (Zoom Support, 2026).
- For Windows users:
- Under “Zoom Workplace for Windows,” click Download (64-bit) — this works for most modern computers.
- A file called ZoomInstallerFull.exe will download to your computer.
- Open that file from your Downloads folder.
- If Windows asks “Do you want to allow this app to make changes?” — click Yes.
- Zoom installs automatically. It may open on its own when finished.
- When Zoom asks to access your microphone and camera, click Allow.
- For Mac users:
- Under “Zoom Workplace for macOS,” click the Download button.
- Choose Apple Silicon if your Mac was made after 2020, or Intel for older Macs.
- Open the downloaded .pkg file and click Continue through the prompts.
- Enter your Mac login password when asked, then click Install Software.
- Once finished, open Zoom from your Applications folder or by pressing Command + Space and typing “Zoom.”
According to Zoom’s official download support article, the process takes under three minutes on a typical home internet connection.
How to Download the Zoom App on Your Phone or Tablet
Getting Zoom on your phone is even simpler. The app is free in both the Apple App Store and Google Play Store.
- For iPhone or iPad:
- Open the App Store (the blue icon with an “A”).
- Tap the Search tab at the bottom.
- Type “Zoom” and tap Search.
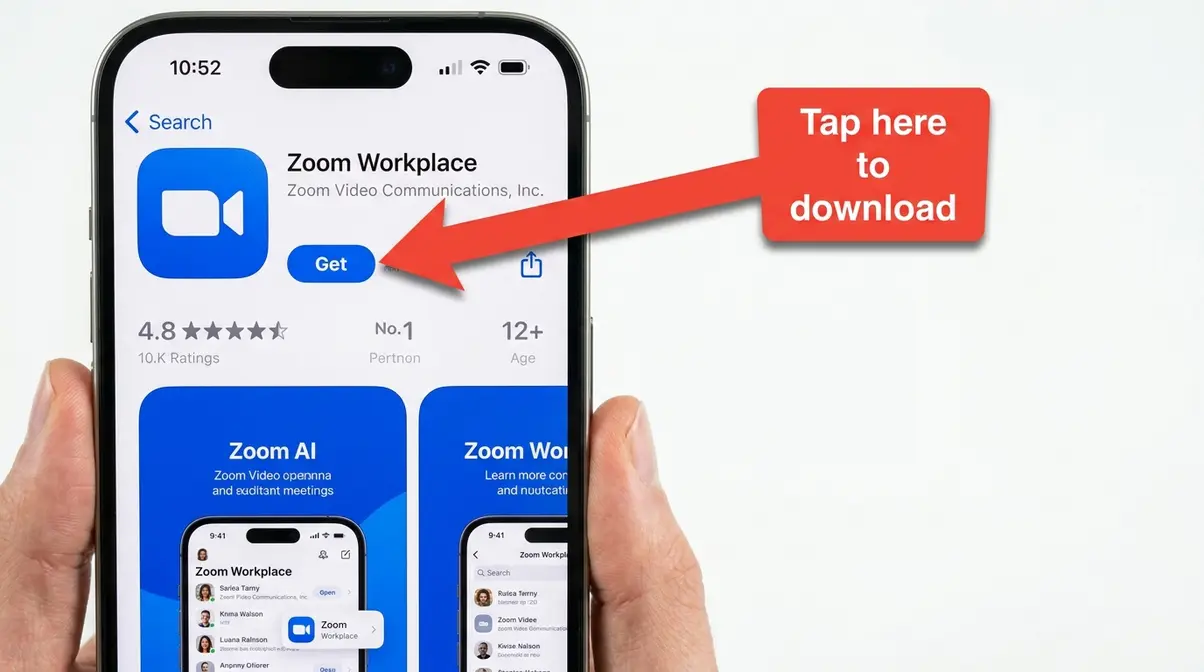
- Tap Zoom Workplace — the official app by Zoom Video Communications.
- Tap Get, then confirm with your Face ID, Touch ID, or Apple ID password.
- Wait for the download. Then tap Open.
- For Android phones (Samsung, Google Pixel, etc.):
- Open the Google Play Store (the colorful triangle icon).
- Tap the search bar at the top and type “Zoom.”
- Tap Zoom Workplace in the results.
- Tap Install and wait for the download to finish.
- Tap Open when it’s done.
When you open the app for the first time, Zoom will ask for permission to use your microphone and camera. Tap Allow for both. You can always change these later in your phone’s settings.
How to Create a Free Zoom Account
You can join meetings without an account. However, creating a free account only takes two minutes and lets you host your own meetings later.
- Go to zoom.us in your browser, or open the Zoom app.
- Click or tap Sign Up (it’s free — no credit card needed).
- Enter your date of birth when asked (Zoom uses this for age verification only).
- Enter your email address and click Continue.
- Check your email for a message from Zoom with a verification code or confirmation link.
- Click the link in that email (or enter the code).
- Create a password — at least 8 characters, with a number and a capital letter.
- You’re done. You now have a free Zoom account.
Tip for seniors: If creating a password feels confusing, you can also sign in with your existing Google account by clicking “Sign in with Google” — no new password needed.
This step is how you “set up Zoom for seniors” or any first-time user — one email address is all it takes (Zoom, 2026).
How to Test Your Mic and Camera Before a Meeting
This is the most important step most beginners skip — and it’s the one that prevents the most embarrassing moments. Zoom provides a free, private testing tool at zoom.us/test.
- Open your browser and go to zoom.us/test.
- Click Join.
- Zoom will open a private test session. No one else is in this call.
- Click Test Speaker — you should hear a ringtone. If you do, your speakers work.
- Click Test Mic — speak a sentence. Watch for the green bar to move. If it moves, your microphone works.
- Click Test Video — you should see yourself on screen. If you do, your camera is working.
- Click Join with Computer Audio to confirm everything is set up correctly.
User consensus across beginner communities indicates that running this test before your first real meeting eliminates nearly all audio and video surprises. If anything doesn’t work during this test, jump to the Troubleshooting section of this guide before your meeting.
How to Join Your First Zoom Meeting {#join-meeting}
Joining a Zoom meeting is the task most beginners worry about most — and it turns out to be the easiest part. You have three ways to join: by clicking a link, by typing in a Meeting ID, or by using your browser without downloading anything. Each method takes under two minutes.
How to Join a Zoom Meeting Using a Link
This is the most common method. Your host sends you an email or text that contains a blue link like: https://zoom.us/j/123456789
- Click that link. Your browser will open automatically.
- A page will appear asking to open Zoom. Click Open Zoom Meetings if you have the app installed.
- Enter your name when asked — this is what other participants will see.
- If the host has set a passcode (a short number or word for security), enter it when prompted.
- You may enter a Waiting Room — a virtual lobby while the host admits participants. Just wait. The host will let you in.
- When you’re admitted, click Join with Computer Audio to turn on your microphone and speakers.
That’s it. You’re in the meeting. According to Zoom’s official joining guide, clicking the invite link is the fastest and most reliable joining method.
How to Join Using a Meeting ID and Passcode
Sometimes you receive a Meeting ID (a 9 to 11-digit number) and a Passcode instead of a link. This is common for scheduled recurring meetings at work or school.
Meeting ID — a unique number that identifies your specific Zoom call, like a room number.
Passcode — a short code the host sets to keep the meeting private.
- Open the Zoom app on your computer or phone.
- Click or tap Join (you do not need to be signed in to do this).
- Type the Meeting ID in the box. Remove any spaces — just numbers.
- Type your name as you want it to appear.
- Click Join.
- Enter the Passcode when prompted.
- Click Join with Computer Audio.
From zoom.us in a browser: Go to zoom.us, click Join a Meeting in the top menu, enter the Meeting ID, and follow the same steps above.
How to Join Zoom Without Downloading the App
You can join a Zoom meeting directly in your web browser — no download, no installation, no account needed. This is perfect if you’re on a borrowed computer or don’t want to install anything.
Starting February 7, 2026, Zoom enabled the “Join from your browser” link by default on all accounts (Zoom Support, 2026). Here’s how to use it:
- Click the meeting invite link from your email or text message.
- Your browser opens a Zoom page that says “Open Zoom Meetings?”
- Do not click Open. Instead, scroll down on that same page.
- Look for a small link that says “Join from your browser” — it may be in smaller text below the main buttons.
- Click Join from your browser.
- Enter your name and the passcode if required.
- Click Allow when your browser asks for microphone and camera permission.
- You’re in. No app required.
Best browsers for this method: Google Chrome, Microsoft Edge, and Mozilla Firefox work best. Safari on iPhone has some limitations with the browser method — use the app instead if possible.
According to Stony Brook University IT’s browser joining guide, Chrome and Firefox provide the most reliable browser-based Zoom experience for participants who cannot or prefer not to install the app.
How to Use Zoom on Any Device {#zoom-devices}
Zoom looks and behaves slightly differently depending on whether you’re on a laptop, an iPhone, or an Android phone. The core features are the same — but the buttons are in different places. This section shows you exactly where to find everything on your specific device.
How to Use Zoom on a Windows or Mac Laptop
The desktop app gives you the fullest Zoom experience. Here’s a quick orientation to the main screen after you open Zoom:
- Home Screen (before a meeting):
- New Meeting — starts an instant meeting right now
- Join — join someone else’s meeting with a Meeting ID
- Schedule — plan a meeting for a future date and time
- Share Screen — share your screen with someone (advanced feature)
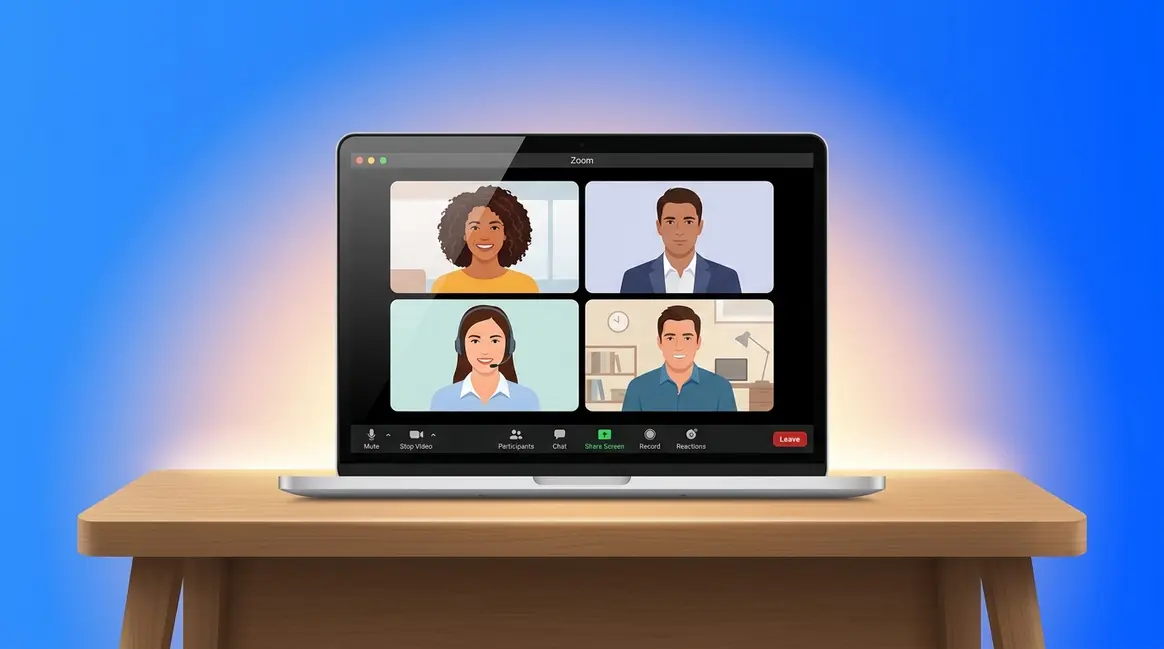
- Inside a meeting, look at the toolbar at the bottom of your screen:
- Mute / Unmute — the microphone icon on the far left
- Start / Stop Video — the camera icon next to it
- Participants — see who’s in the meeting
- Chat — send text messages to the group
- Share Screen — show your screen to everyone
- Leave — exit the meeting (bottom-right corner, red button)
One important tip for laptop users: If you hover your mouse over the Zoom meeting window, the toolbar appears. If it disappears, just move your mouse and it comes back.
How to Use Zoom on an iPhone or iPad
On iPhone and iPad, the Zoom controls are at the bottom of the screen during a meeting — similar to the desktop, but adapted for touch screens.
- Before a meeting — the home screen shows:
- New Meeting (orange camera icon)
- Join (blue icon with a plus sign)
- Schedule (calendar icon)
- Share Screen (arrow icon)
- Inside a meeting on iPhone/iPad:
- Tap the screen once to make the toolbar appear at the bottom.
- Mute is the microphone icon — bottom left.
- Video is the camera icon — next to Mute.
- Participants — tap to see who’s on the call.
- More (three dots at bottom right) — reveals Chat, Reactions, and other options.
- Leave — top-right corner, in red.
iPad tip: On an iPad, you have more screen space, so the toolbar shows more buttons at once compared to iPhone. The layout looks closer to the desktop version.
Common pain points reported by new Zoom users on iPhone include accidentally muting themselves by tapping the screen — tap once to show controls, then tap the microphone icon specifically to mute or unmute.
How to Use Zoom on an Android Phone
Android phones (Samsung Galaxy, Google Pixel, Motorola, and others) follow a similar layout to iPhone, with a few small differences.
- Inside a meeting on Android:
- Tap your screen once to reveal the toolbar at the bottom.
- Microphone icon — bottom left, tap to mute/unmute.
- Camera icon — tap to turn your video on or off.
- Participants — see who’s in the call.
- More (three dots) — access Chat, Reactions, and Raise Hand.
- Leave — top-right corner.
Samsung Galaxy tip: Some Samsung phones have a built-in camera feature called “Director’s View” that can interfere with Zoom. If your camera looks strange during a call, open your phone’s Camera app settings and disable any AI video enhancement features before your next Zoom meeting.
Desktop vs. Mobile: Key Differences to Know
| Feature | Desktop (Windows/Mac) | Mobile (iPhone/Android) |
|---|---|---|
| Screen sharing | Full feature — any window | Limited — mainly phone screen |
| Virtual backgrounds | Full control | Available but basic |
| Breakout rooms | Full host control | Can participate, limited host |
| Chat | Always visible | Hidden in “More” menu |
| Keyboard shortcuts | Yes (e.g., Space to mute) | No keyboard shortcuts |
| Screen size | Larger — easier to read | Smaller — tap carefully |
| Battery drain | Minimal | Significant on long calls |
| Best for | Work meetings, presentations | Quick check-ins, joining on the go |
Bottom line: Use the desktop app for important meetings where you need to share your screen or see everyone clearly. Use mobile when you’re away from your computer or joining a quick call.
Essential In-Meeting Controls Every Beginner Should Know {#in-meeting-controls}
Once you’re inside a Zoom meeting, five controls handle 95% of what you’ll ever need. Learning these before your first real meeting is the single best thing you can do to show up with confidence.
A Map of the Zoom Toolbar
The Zoom toolbar lives at the bottom of your screen during any meeting. Move your mouse (on desktop) or tap the screen (on mobile) if it disappears.
Here’s a plain-English translation of each button from left to right:
| Button | What It Does | Beginner Tip |
|---|---|---|
| Microphone | Mutes/unmutes your audio | Click the arrow next to it to choose your mic |
| Camera | Turns your video on/off | Click the arrow to choose which camera |
| Security | Host controls meeting safety | Mostly for the host |
| Participants | Opens the participant list | See who’s on the call |
| Chat | Opens the text chat panel | Type messages to everyone |
| Share Screen | Shows your screen to everyone | You choose which window to share |
| Reactions | Raise hand, clap, thumbs up | Use to signal without interrupting |
| Leave | Exits the meeting | Red button, bottom-right |
How to Mute, Unmute, and Manage Your Camera
Muting yourself is the most important skill in any Zoom meeting. Forgetting to mute when you’re not speaking is the #1 beginner mistake, according to user consensus in online beginner communities — and it distracts everyone on the call.
- To mute yourself:
- Click or tap the microphone icon in the bottom-left corner.
- When you are muted, the icon shows a red line through it.
- When you are unmuted, the icon is plain (no red line).
Keyboard shortcut (desktop only): Press and hold the Space bar to temporarily unmute yourself — release it to mute again. This is the fastest way to speak briefly without fumbling with the mouse.
- To turn your camera on or off:
- Click or tap the camera icon next to the microphone icon.
- A red line through the camera icon means your video is off — others see a black box or your profile picture instead.
- No red line means your camera is on and others can see you.
Common camera issue: If you join and your camera shows a black screen, another app (like Skype or FaceTime) may be using your camera. Close those apps, then click the camera icon twice — once to turn off, once to turn back on.
How to Use Chat and See Other Participants
The Chat panel lets you send text messages to everyone in the meeting — or privately to one person. It’s useful for sharing links, answering questions without interrupting the speaker, or sending a quick note.
- To open Chat:
- Desktop: Click Chat in the toolbar. A panel opens on the right side of your screen.
- Mobile: Tap More (three dots) → tap Chat.
- Type your message at the bottom of the Chat panel and press Enter (desktop) or Send (mobile).
- To message one person privately:
- In the Chat panel, click the dropdown that says “Everyone.”
- Select the person’s name from the list.
- Type your message — only they will see it.
- To see who is in the meeting:
- Click Participants in the toolbar.
- A list appears showing everyone’s name, their mute status, and their video status.
- If you’re the host, you can mute others from this panel.
How to Share Your Screen Step by Step
Screen sharing lets you show a document, a photo, a website — anything on your screen — to everyone in the meeting. It sounds complicated, but it takes about five seconds.
- Click Share Screen in the toolbar (the green icon with an upward arrow).
- A window appears showing everything open on your computer.
- Click the window or app you want to share — for example, a Word document or a web browser.
- Click the blue Share button in the bottom-right corner of that selection window.
- Everyone in the meeting can now see that window.
- To stop sharing, click the red Stop Share button at the top of your screen.
Important: Only share the specific window you want — not your entire desktop — to keep personal files private. Select the individual app window, not “Desktop 1.”
According to Zoom’s official getting started guide, screen sharing is available to all participants on the free Basic plan with no additional setup required.
Virtual Backgrounds, Breakout Rooms, and Captions
These three features come up frequently for beginners — here’s a quick explanation of each.
Virtual Backgrounds replace your real background with a photo or video during a meeting. This is useful if your room is messy or you want to look more professional.
- Click the arrow next to the Camera icon → select Choose Virtual Background.
- Pick from Zoom’s built-in options (office, beach, etc.) or upload your own photo.
- Best results: Sit in front of a plain wall. Virtual backgrounds work poorly in cluttered or dark rooms without a green screen.
Breakout Rooms are smaller, separate meetings within a larger meeting. Your host splits participants into groups — you’ll get a notification to join your assigned room. Just click Join when the prompt appears. When the host ends the breakout, you return to the main meeting automatically.
Closed Captions / Live Transcription shows real-time text of what’s being said at the bottom of your screen — helpful for those with hearing difficulties or in noisy environments.
- Click More in the toolbar → Captions → Show Captions.
- Note: The host must enable this feature for the meeting. If you don’t see it, ask your host to turn on captions.
How to Host and Schedule a Zoom Meeting {#host-schedule}
Hosting your own Zoom meeting is the third and final stage of the Zoom Confidence Loop — the moment you go from passenger to driver. The free plan makes this surprisingly simple. You can start a meeting in under 30 seconds.
How to Start an Instant Meeting Right Now
This is also how you practice using Zoom by yourself — the safest way to learn before any real meeting.
- Open the Zoom app on your computer or phone.
- Click or tap New Meeting (the orange camera icon on the home screen).
- A meeting starts immediately. You are the only person in it.
- Practice muting, unmuting, turning your camera on and off, and using the toolbar.
- Try clicking Share Screen and sharing a document or website.
- When you’re done, click Leave → End Meeting for All.
This solo practice session is completely private. No one can join unless you invite them. User consensus across beginner communities indicates that even 10 minutes of solo practice dramatically reduces first-meeting anxiety — which is the core principle behind the Zoom Confidence Loop.
How to Schedule a Meeting in Advance
Scheduling lets you plan a meeting for a future date, send invites automatically, and set a passcode for security.
- Click Schedule (the calendar icon) on the Zoom home screen.
- Fill in the Topic — for example, “Family Call Sunday 3pm.”
- Set the Date and Time using the dropdowns.
- Set the Duration — this is just an estimate. The meeting won’t end automatically (unless you’re on the free plan and hit the 40-minute limit for groups).
- Under Security, leave Passcode checked — Zoom generates one automatically. You can customize it to something easy to share, like “family2026.”
- Click Save.
Zoom will create the meeting and show you the invite details. You’ll see the Meeting ID, Passcode, and a join link. Copy these to share with participants.
How to Invite People to Your Zoom Meeting
After scheduling (or starting an instant meeting), you need to share the details with participants. There are two easy ways:
- Method 1 — Copy the invite link:
- In the Zoom app, go to Meetings (the clock icon at the bottom or top of the home screen).
- Click your scheduled meeting.
- Click Copy Invitation.
- Paste it into an email, text message, or WhatsApp message and send it.
- Method 2 — Share just the Meeting ID and Passcode:
- Simply text or email: “Join my Zoom meeting. Meeting ID: 123 456 7890 | Passcode: family2026”
- Recipients can enter this manually in the Zoom app under Join.
- From inside an active meeting:
- Click Participants → Invite → Copy Invite Link or Email to send directly.
Understanding the 40-Minute Free Plan Limit
The free Zoom Basic plan limits group meetings (three or more people) to 40 minutes per session. One-on-one meetings between just two people have no time limit (Zoom Support, 2026).
When 40 minutes is up, Zoom shows a countdown warning at the five-minute mark. At zero, the meeting ends for everyone. Here’s what you can do:
| Situation | Solution |
|---|---|
| Meeting approaching 40 min | Start a new meeting immediately — same participants rejoin |
| Hosting regular long meetings | Upgrade to Zoom Pro ($13.33/month as of 2026) |
| One-on-one catch-up | No limit on free plan — just you and one other person |
| Joining someone else’s meeting | No limit — the host’s plan determines the limit |
The simplest workaround: When the meeting ends at 40 minutes, click New Meeting and send the new link to your participants. The break is usually less than 60 seconds.
Zoom Troubleshooting: When Things Go Wrong {#troubleshooting}
Even experienced users run into Zoom problems. The good news: almost every common issue has a simple fix. This section covers the four problems beginners encounter most often — in the order most likely to affect you.
Fixing Microphone and Audio Problems
“No one can hear me” is the most common beginner complaint. Work through these steps in order, testing after each one.
Step 1 — Check if you’re muted. Look at the microphone icon in the toolbar. A red line means you’re muted. Click it to unmute.
- Step 2 — Choose the right microphone in Zoom:
- Click the arrow (^) next to the microphone icon in the toolbar.
- Under “Select a Microphone,” you’ll see a list of audio devices.
- Choose your built-in microphone (usually labeled “Built-in Microphone” or your headset name).
- Speak and watch for the green level bar to move.
Step 3 — Check your computer’s microphone permissions:
- Windows: Go to Settings → Privacy & Security → Microphone. Make sure “Microphone access” is ON and that Zoom is allowed.
- Mac: Go to System Settings → Privacy & Security → Microphone. Make sure Zoom has a checkmark.
- iPhone/iPad: Go to Settings → Privacy → Microphone and turn on Zoom.
- Android: Go to Settings → Apps → Zoom → Permissions and enable Microphone.
Step 4 — Close other apps. If Skype, Teams, FaceTime, or Discord is open, close them. Only one app can use your microphone at a time (Zoom Support, 2026).
Step 5 — Run the audio test. Go to zoom.us/test and run the speaker and microphone test again. If the test shows no input, the issue is with your device, not Zoom.
How to Give Zoom Access to Your Camera
If your camera shows a black screen or Zoom says “Camera is stopped,” the most likely cause is a blocked permission. According to Zoom’s official permissions support page, camera access must be granted at the operating system level — not just inside Zoom.
- Windows (Windows 10 or 11):
- Click the Start button → Settings (gear icon).
- Go to Privacy & Security → Camera.
- Make sure Camera access is toggled ON.
- Scroll down and make sure Zoom is listed and toggled ON.
- Restart Zoom.
- Mac (macOS):
- Click the Apple menu (top-left) → System Settings.
- Go to Privacy & Security → Camera.
- Find Zoom in the list and make sure its toggle is ON.
- Restart Zoom.
- iPhone/iPad:
- Go to Settings → Privacy → Camera.
- Find Zoom and turn the toggle ON (green).
- Android:
- Go to Settings → Apps → Zoom → Permissions.
- Tap Camera and select Allow.
If your camera works in other apps (like FaceTime or your phone’s camera) but not in Zoom, reinstalling the Zoom app usually resolves the conflict by prompting the operating system to grant permissions fresh.
How to Turn Off Auto-Zoom in Zoom
Some users notice their camera automatically zooms in and out during a meeting — following their face as they move. This is called Auto-framing (also called face tracking or person tracking), and it can be distracting or disorienting.
- To disable Auto-framing in Zoom (desktop):
- Open the Zoom app.
- Click the gear icon (Settings) in the top-right corner.
- Click Video & effects in the left menu.
- Look for Appearance or Auto-framing settings.
- Find Auto-framing, Face tracking, or Person tracking — toggle it OFF.
- If you’re on a Mac or iPad and the zooming continues: The cause may be Apple Center Stage — a separate Apple feature, not Zoom’s. To disable it:
- During a Zoom meeting, click the green camera icon in the top menu bar on Mac.
- Look for Center Stage and click it to turn it off.
According to the Zoom Community forum, disabling Auto-framing in Zoom settings and Center Stage on Apple devices resolves the zooming issue in virtually all cases.
What to Do If Zoom Still Isn’t Working
If you’ve tried the steps above and Zoom still isn’t cooperating, work through this escalation checklist:
- Restart Zoom. Close it completely (not just minimize it) and reopen.
- Restart your device. This fixes more problems than any other single step.
- Check your internet connection. Open a website in your browser. If it’s slow, move closer to your Wi-Fi router.
- Update Zoom. In the Zoom app, click your profile picture (top-right) → Check for Updates. Install any available update.
- Use the browser fallback. If the app isn’t working, try joining via your browser at zoom.us — click “Join from your browser” as described in the joining section above.
- Uninstall and reinstall Zoom. This resets all permissions and often resolves persistent issues. Download a fresh copy from zoom.us/download.
- Contact Zoom Support. Go to support.zoom.com and use the live chat or submit a support ticket. Their team responds quickly and has seen every beginner issue imaginable.
Common pain points reported by new Zoom users include internet connection problems being mistaken for Zoom bugs — always rule out your internet first by opening another website or streaming a video.
Limitations of Zoom and When to Consider Alternatives
Understanding what Zoom’s free plan cannot do helps you make the right choice — and avoid frustration later.
Common Pitfalls to Avoid
Pitfall 1 — Forgetting the 40-minute limit before a long meeting. If you’re hosting a family reunion call or a multi-hour work session, the free plan will cut your meeting off at 40 minutes. Warn your participants in advance, or upgrade to Zoom Pro before the event.
Pitfall 2 — Sharing your entire desktop instead of one window. When you click “Share Screen,” choosing “Desktop 1” shows everything — including personal files, notifications, and open tabs. Always select the specific app window you want to share instead.
Pitfall 3 — Leaving your microphone unmuted in a noisy environment. Background noise (dogs barking, traffic, TV) is amplified for everyone in the meeting. Mute yourself whenever you’re not actively speaking — it’s good Zoom etiquette and prevents distractions.
Pitfall 4 — Joining from a very weak Wi-Fi signal. Zoom requires a stable internet connection. Frozen video and choppy audio are almost always caused by poor Wi-Fi, not a Zoom bug. If possible, move closer to your router or use a wired ethernet connection for important calls.
Pitfall 5 — Not testing audio and video before an important meeting. Run zoom.us/test at least 15 minutes before any important call. This gives you time to fix problems without the pressure of people waiting.
When to Choose Alternatives
Choose Google Meet instead if everyone you’re meeting with uses Gmail or Google Workspace. Google Meet has no time limit on free group meetings (up to 60 minutes as of 2026), requires no download, and opens directly in Chrome. It’s simpler for very occasional use.
Choose Microsoft Teams instead if your workplace uses Microsoft 365. Teams is deeply integrated with Outlook, Word, and SharePoint — making it the better choice for document-heavy work meetings.
Consider sticking with a phone call if you’re connecting with one or two people who have very slow internet or older devices. A regular phone call has zero technical requirements and zero setup.
When to Seek Expert Help
If you’ve followed every step in this guide and still can’t get Zoom to work, the issue may be specific to your device’s operating system, security software (antivirus programs sometimes block Zoom’s camera access), or workplace network settings. In these cases:
- Ask your workplace IT department — they can whitelist Zoom on corporate networks.
- Contact Zoom Support directly at support.zoom.com — they offer live chat for free plan users.
- Visit your local library or senior center — many offer free tech help sessions specifically for Zoom setup.
Frequently Asked Questions {#faq}
1. How do I use Zoom for the first time?
Using Zoom for the first time starts with downloading the free app from zoom.us/download on a computer, or from the App Store/Google Play on a phone. Once installed, click “Join” and enter the Meeting ID from your invitation — no account required to join. Our team recommends running the audio and video test at zoom.us/test before your first real meeting. This takes about three minutes and eliminates the most common first-timer problems — frozen cameras, silent microphones, and audio feedback.
2. How can I practice using Zoom by myself?
You can practice Zoom completely alone using two free methods. First, go to zoom.us/test — this opens a private test room where you can check your microphone, speakers, and camera without anyone watching. Second, open the Zoom app and click “New Meeting” to start a solo session — you’re the only person in it, so you can explore every button at your own pace. User consensus across beginner communities confirms that even 10 minutes of solo practice dramatically reduces first-meeting anxiety. This is the first stage of the Zoom Confidence Loop.
3. Can I join a Zoom meeting if I don’t have Zoom?
Yes — you can join a Zoom meeting directly from your web browser without downloading or installing anything. When you click the meeting invite link, look for the small “Join from your browser” text below the main buttons on the launch page. Click it, enter your name and passcode, and allow your browser to access your microphone and camera. As of February 7, 2026, Zoom enabled this browser option by default on all accounts (Zoom Support, 2026). Chrome and Firefox work best for this method.
4. How do I set up Zoom for seniors?
Setting up Zoom for seniors takes about five minutes and requires only an email address. Go to zoom.us, click “Sign Up Free,” enter your email address, and follow the confirmation email. The app is available on any smartphone or computer — no special equipment needed. According to Pew Research Center (2022), 61% of adults 65 and older already own a smartphone capable of running Zoom. For seniors who find passwords difficult, signing in with a Google account avoids creating a new password entirely. The Senior Living Zoom guide offers additional device-specific tips for older adults.
5. Why is Zoom no longer popular?
Zoom remains widely used — but it faces more competition than it did during the pandemic peak of 2020-2021. Google Meet gained ground by removing time limits for free users and requiring no download. Microsoft Teams became standard in workplaces using Microsoft 365. For casual users, FaceTime (Apple) and WhatsApp video calls replaced Zoom for personal calls. Zoom responded by adding AI features, expanded free-tier capabilities, and better integrations. For work meetings and online classes, Zoom remains one of the most commonly required platforms in 2026.
6. What not to do during a Zoom meeting?
The most important rule: don’t forget to mute yourself when you’re not speaking. Background noise — a barking dog, TV, or street traffic — disrupts everyone on the call. Additional beginner mistakes to avoid: joining from a noisy or backlit room (sit facing a window, not with one behind you); eating on camera; using your phone in a moving car (unstable video and audio); sharing your entire desktop instead of a specific window; and leaving the meeting without saying goodbye — always click “Leave” so others know you’ve gone. Forbes cites unmuting at the wrong moment as the single most disruptive meeting behavior.
7. How much does Zoom cost per month?
Zoom’s Basic plan is completely free with no credit card required. It covers joining any meeting, hosting group meetings up to 40 minutes, video, audio, chat, and screen sharing for up to 100 participants. If you need longer meetings, Zoom Pro starts at approximately $13.33 per month (billed annually) as of 2026 — this removes the 40-minute group meeting limit and adds cloud recording. For most beginners using Zoom for family calls, school, or occasional work meetings, the free plan covers everything you need (Zoom, 2026).
Conclusion
For anyone learning how to use Zoom for beginners in 2026, the path forward is simpler than it looks. Zoom is free to download, works on every major device, and requires nothing more than an internet connection and an email address to get started. According to Pew Research Center (2022), 61% of adults 65 and older already own a smartphone capable of running it — the technology is already in your hands. The key steps are: download the app from zoom.us/download, test your audio and camera at zoom.us/test, join a meeting by clicking your invite link, and practice the controls in a solo session before your first real call.
The Zoom Confidence Loop — practice alone, join as a participant, then host your own meeting — exists precisely because confidence comes from repetition, not from reading. Each stage builds on the last, and by the time you host your own meeting, the controls that once felt overwhelming will feel completely natural. That’s not a promise of perfection; it’s a description of how every Zoom user, at every age, eventually gets there.
Your next step: open zoom.us/test right now, before you close this guide. Run the three-minute audio and video check. That single action, taken today, is the difference between showing up prepared and showing up anxious. The noobsguidetotechnology.com team will be here with updated guides as Zoom’s interface evolves — but the fundamentals you learned today will serve you for years to come.