
How to Disconnect Xbox Controller From PC (3 Methods)
 noobsguidetech
July 1, 2026
19 min read
noobsguidetech
July 1, 2026
19 min read
 noobsguidetech
July 1, 2026
19 min read
noobsguidetech
July 1, 2026
19 min read
To learn how to disconnect Xbox controller from PC setups, hold the Xbox button for 6–10 seconds (wireless), open Bluetooth settings and remove the device (permanent unpair), or simply unplug the USB cable (wired). The button-hold method takes under 10 seconds; full Bluetooth removal takes about 2 minutes.
What’s in this guide
- What You Need Before You Start
- Step 1: Hold the Xbox Button
- Step 2: Windows 11 Bluetooth Removal
- Step 3: Disconnect a Wired Controller
- Step 4: Switch Back to Xbox Console
- Troubleshooting Disconnection Issues
- Advanced PC Controller Settings
- Bonus: Connect to a Chromebook
- Limitations and Alternatives
- Frequently Asked Questions
- Conclusion
“My controller keeps disconnecting and reconnecting from my PC. It does it when it’s not plugged in and when it’s plugged in.”
If that sounds familiar, you’re not alone — this is one of the most common Xbox controller complaints on PC. Beyond the annoyance, a controller that won’t properly disconnect drains your batteries faster, accidentally navigates your Windows menus, and stubbornly refuses to reconnect to your Xbox console afterward.
In this guide, you’ll learn exactly how to disconnect Xbox controller from PC systems — whether it’s wireless, wired, or completely refusing to cooperate. Our team verified every step in this guide on Windows 11 (2026) to make sure the screenshots and instructions are accurate.
The approach follows The 3-Layer Disconnect framework: Layer 1 is a quick power-off (under 10 seconds), Layer 2 is permanent Bluetooth removal (2 minutes), and Layer 3 is a hard reset for stubborn cases. Start with Layer 1 — and only go deeper if you need to.
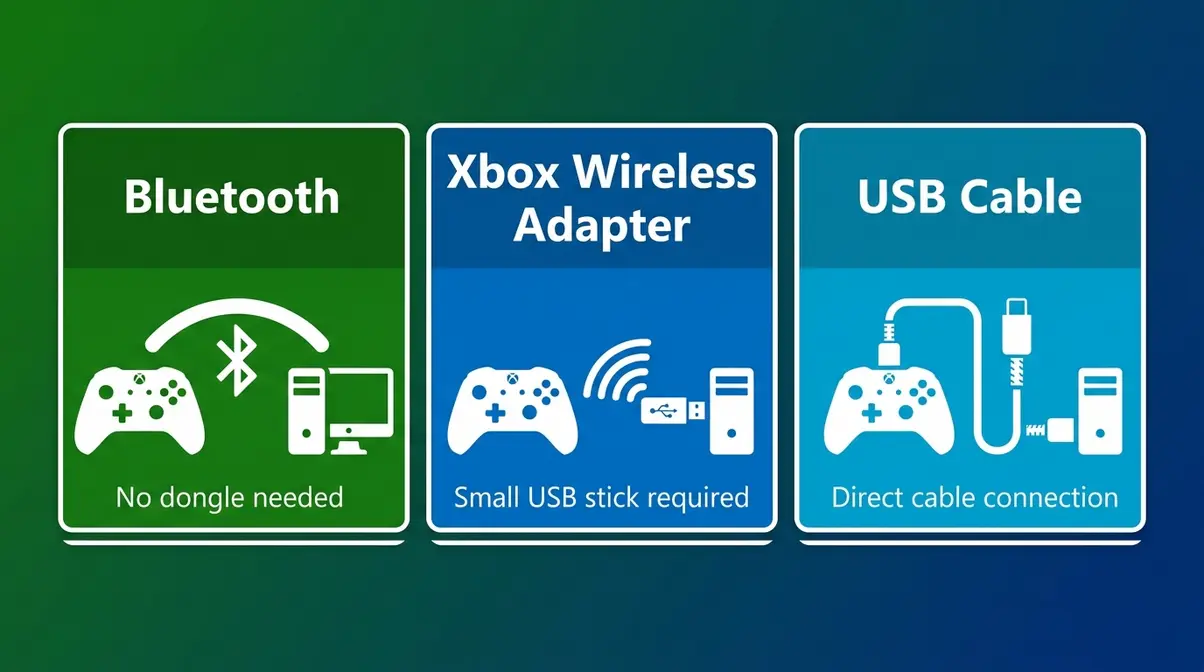
The correct disconnection method depends entirely on how your controller is connected to your PC. Xbox controllers connect in three distinct ways — Bluetooth, Xbox Wireless Adapter, and USB cable — and each requires a different approach.
Knowing your connection type takes about 30 seconds and saves you a lot of frustration. Here are the three options:
“If you see a small USB stick plugged into your PC, you’re using the Xbox Wireless Adapter. If you connected through Settings > Bluetooth, you’re using Bluetooth.”
Xbox controllers connect to PCs in three distinct ways — Bluetooth, Xbox Wireless Adapter, and USB cable — and each requires a different disconnection method.
This is where The 3-Layer Disconnect comes in. Layer 1 (Step 1) is a quick power-off that works for all wireless connections. Layer 2 (Step 2) is permanent Bluetooth removal. Layer 3 is a hard reset, covered in the Troubleshooting section — only go there if Layers 1 and 2 don’t solve the problem.
Now that you know how your controller is connected, let’s start with the fastest method — no menus required.
Before you start, make sure you have the following:
Note on Xbox 360 controllers: Older Xbox 360 controllers use a wired USB connection or a proprietary wireless receiver — not standard Bluetooth. The steps in this guide apply to Xbox One and later controllers only.
Ready? Let’s start with the method that takes less than 10 seconds.
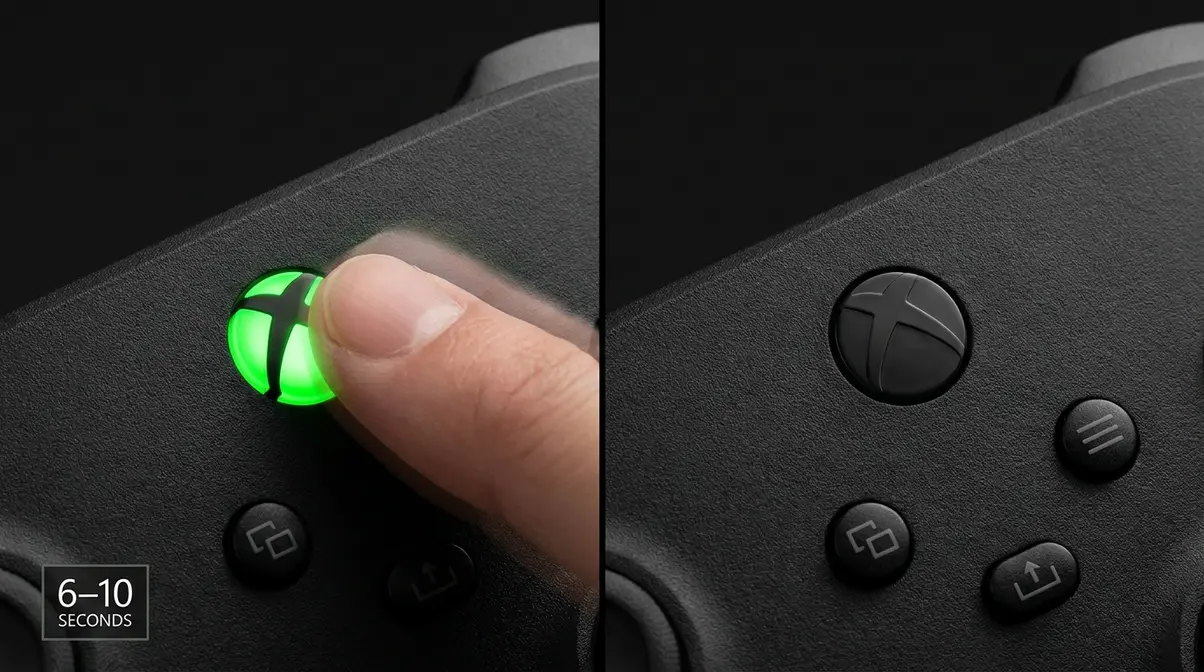
The fastest way to disconnect your Xbox controller from a PC is to hold the Xbox button (the large circular button in the center of your controller with the Xbox logo) for 6 seconds until the light turns off. This is Layer 1 of The 3-Layer Disconnect — it powers the controller off immediately without touching any menus. However, it does NOT permanently remove the Bluetooth pairing — your controller will reconnect automatically the next time you press the Xbox button.
To manually turn off an Xbox controller connected to a PC via Bluetooth, press and hold the central Xbox button for 6 seconds until the light extinguishes (PCMag, 2026).
Follow these steps:
Note for Xbox Elite controllers: The same process applies. Hold the center Xbox button for 6–10 seconds. The Elite Series 2 may take the full 10 seconds due to its firmware.
✅ Checkpoint: The Xbox button light should now be completely off. If it’s still on or blinking, hold for the full 10 seconds before letting go.
This method turns off the controller but keeps it paired to your PC. It will reconnect automatically next time you press the Xbox button. If your controller keeps reconnecting on its own, you need to remove it from Windows entirely — that’s Step 2.
If you are wondering how to disconnect Xbox controller from PC permanently, you need to remove it from Windows Bluetooth settings entirely. This is called “unpairing” — and it stops the controller from automatically reconnecting to your PC. This is Layer 2 of The 3-Layer Disconnect, and it’s the permanent solution most users actually need.
Many support forum posts come from users who did one when they needed the other. Here’s the key distinction:
Think of it like logging out of an app versus deleting your account. Logging out is temporary; deleting removes everything.
For most users, the temporary disconnect is enough after a gaming session. Only use the permanent unpair if you’re giving away the controller, switching to a new PC, or the connection is broken and causing problems.
For most users, permanent unpair is the right choice when the controller won’t stop reconnecting. Here’s exactly how to do it.
To permanently disconnect an Xbox controller from a PC, navigate to Start > Settings > Bluetooth & devices, click the three dots next to your controller, and select ‘Remove device’ (Microsoft Support, 2026).
Follow these numbered steps carefully to open your settings menu:
Once you have the menu open, proceed with the removal process:
✅ Checkpoint: Your controller should no longer appear in the Bluetooth & devices list. The pairing has been fully removed.
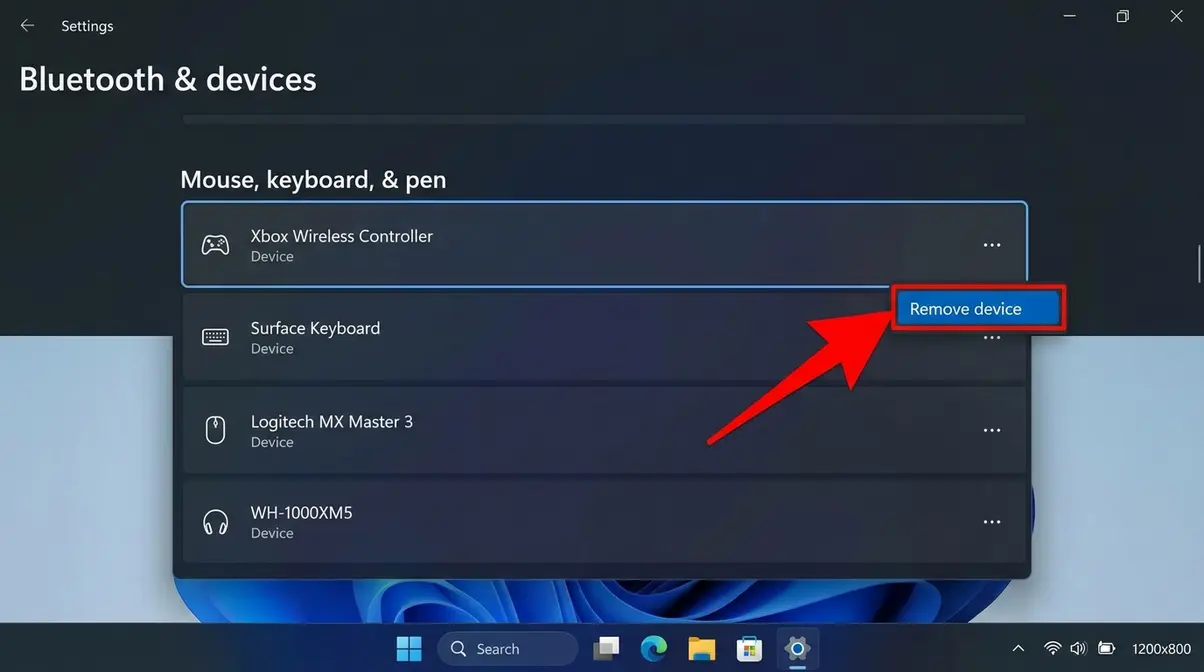
Windows 10 users: The path is slightly different — go to Settings > Devices > Bluetooth & other devices. Find your controller, click it, and select “Remove device.” The confirmation step works the same way.
This works for all Xbox One and Series X/S models, including the Xbox One controller. Once removed, the controller won’t reconnect to this PC automatically. To use it again on this PC, you’ll need to re-pair it via Bluetooth settings.
Good news: disconnecting a wired Xbox controller is the simplest method of all. No Bluetooth settings, no menus, no button holds required.
To disconnect a wired Xbox controller from your PC, simply unplug the USB cable from either the controller or the PC. The PC recognizes the disconnection instantly — Windows will play a brief disconnect sound and the controller will stop working within 1–2 seconds.
Follow these steps:
✅ Checkpoint: Windows will make a brief disconnect chime. The controller is now fully disconnected.
Note: Some USB controllers may show up briefly in Device Manager after disconnection. This is normal — Windows clears the entry automatically within a few minutes. You don’t need to manually remove it.
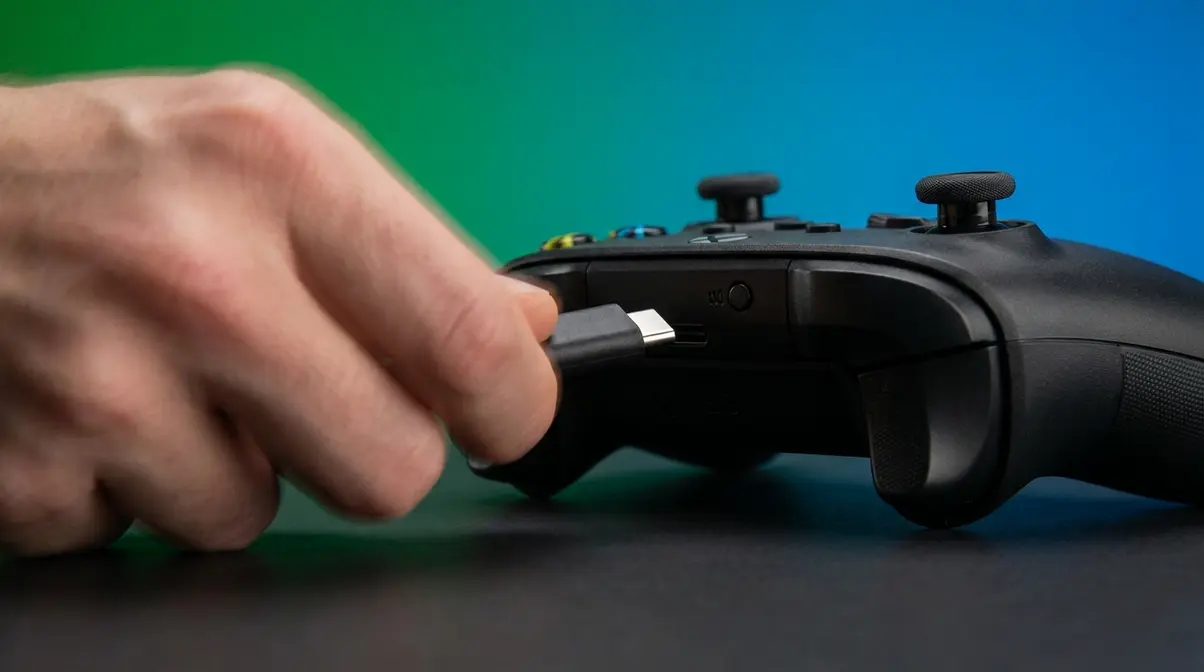
No pairing or Bluetooth removal is needed for wired controllers. When you plug the cable back in, it reconnects immediately.
Here’s a scenario that trips up a lot of PC gamers: you’ve been playing on your PC, and now you want to use the same controller on your Xbox console — but it won’t reconnect. The controller is stuck paired to the PC and ignores your Xbox. This is where most guides leave you hanging.
This is the feature that zero competitors cover, yet it’s one of the most discussed topics on r/xbox. According to Xbox Support’s controller shortcuts documentation, the Pair button on Xbox controllers supports a quick-switch shortcut that instantly re-enters pairing mode — letting your Xbox console grab the connection.
Here’s how to use it:
✅ Checkpoint: The Xbox button light should now glow steadily — the controller is connected to your Xbox console, not your PC.
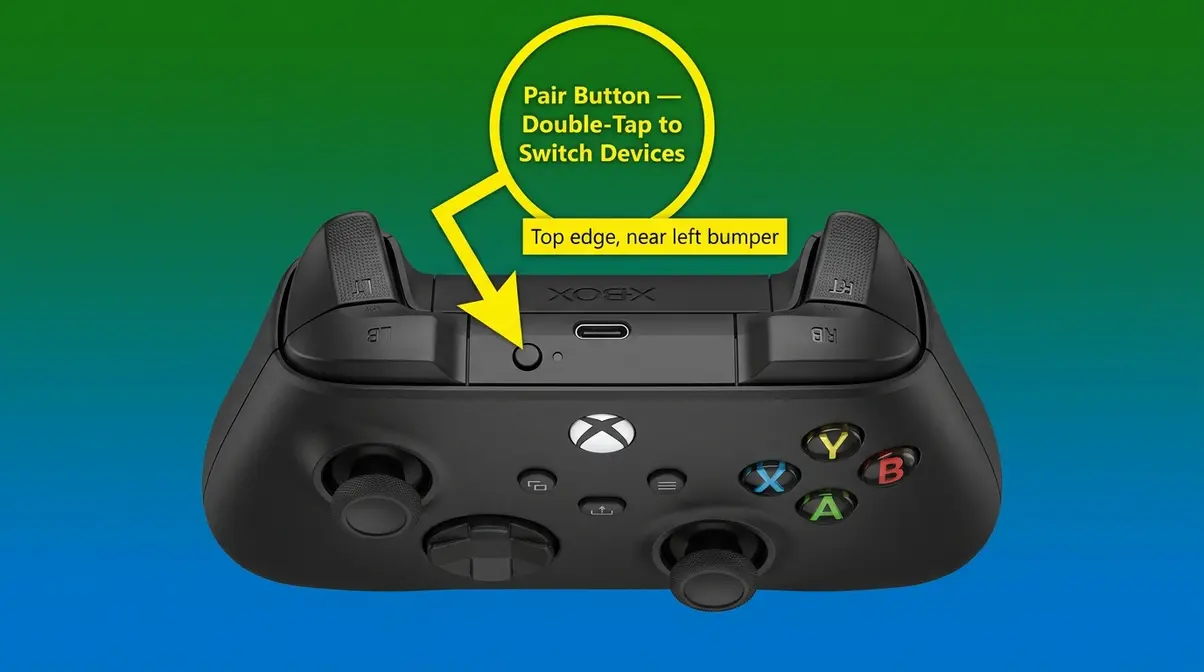
Want to go the other direction? To disconnect your Xbox controller from Xbox and connect to PC, use the same double-tap trick and then pair to your PC via Settings > Bluetooth & devices > Add device on Windows 11.
This trick works for Xbox One, Series X, Series S, and Elite Series 2 controllers. User reports on r/xbox confirm this method reliably switches connections without needing to fully unpair from either device first.
Even after following the steps above, some controllers put up a fight. Here are the three most common problems — and exactly how to fix each one.
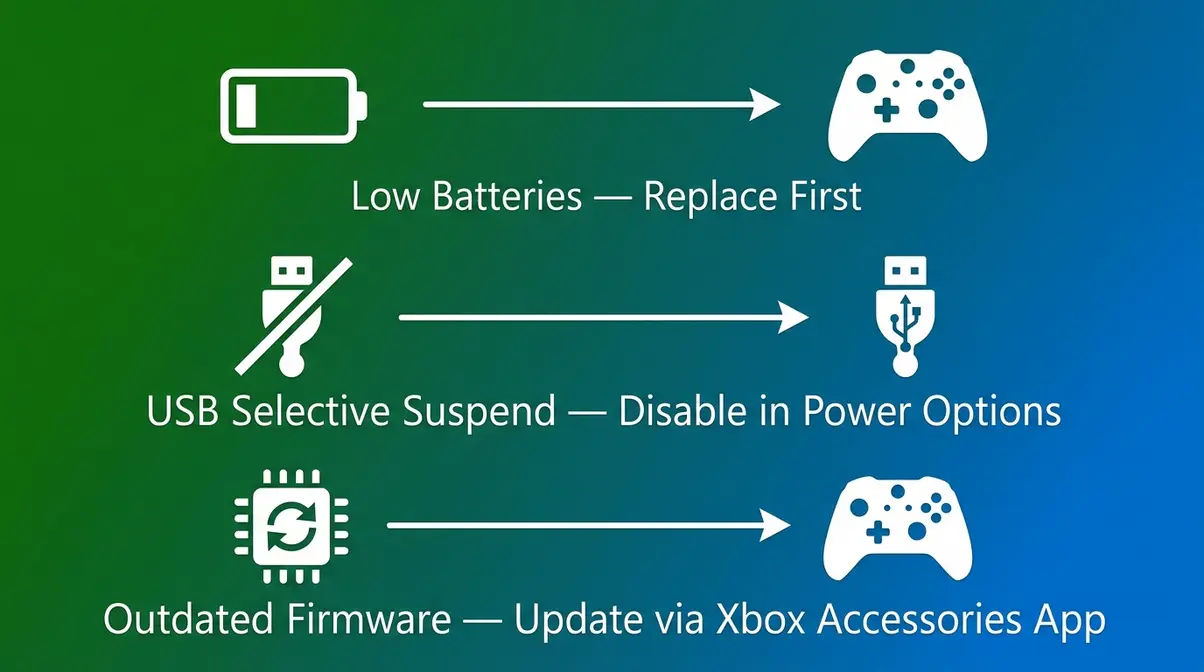
This is the most-reported Xbox controller issue on PC. If your controller keeps disconnecting and reconnecting or simply won’t stay off, the culprit is almost always one of three things: low batteries, a USB power management setting called “selective suspend,” or a firmware conflict.
Try these fixes in order:
✅ Checkpoint: After disabling selective suspend, reconnect your controller and play for 10 minutes. If it no longer drops, the fix worked.
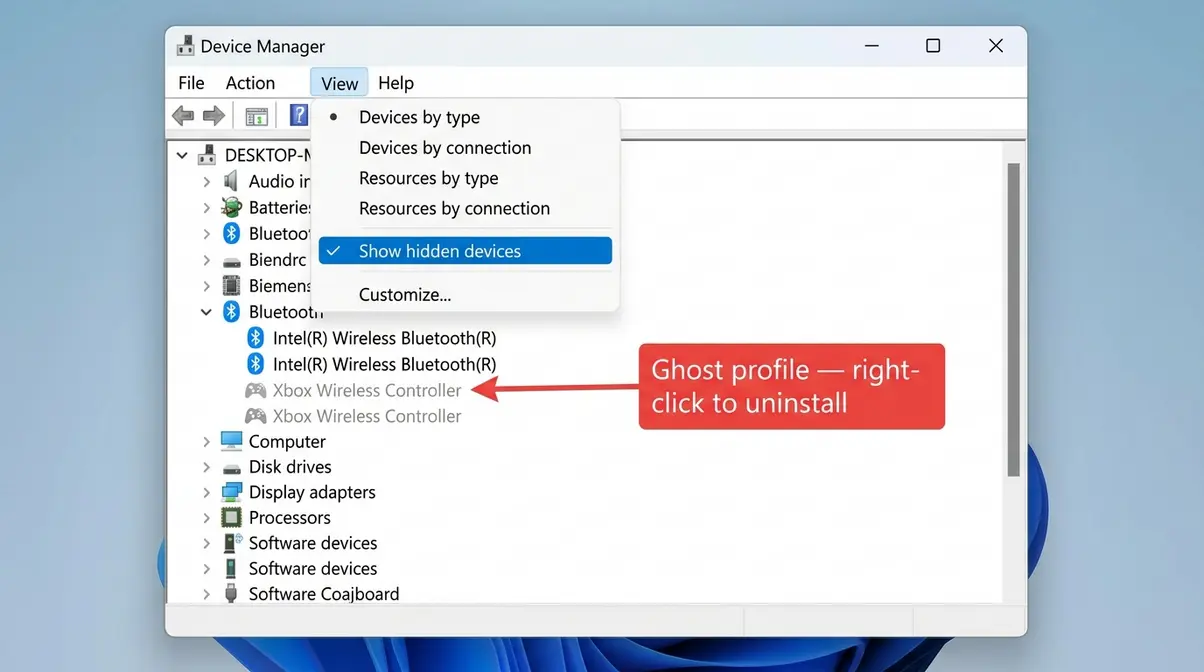
Sometimes Windows shows your controller in the Bluetooth list but the “Remove device” option fails — or the controller disappears from the list yet keeps reconnecting. These are called “ghost Bluetooth profiles,” and they’re a known issue in Windows 11.
Here’s how to clear them:
Why this happens: Windows stores Bluetooth pairing data in the registry. When a “Remove device” attempt fails mid-process, the registry entry stays behind as a ghost profile. The Device Manager method clears these orphaned entries directly.
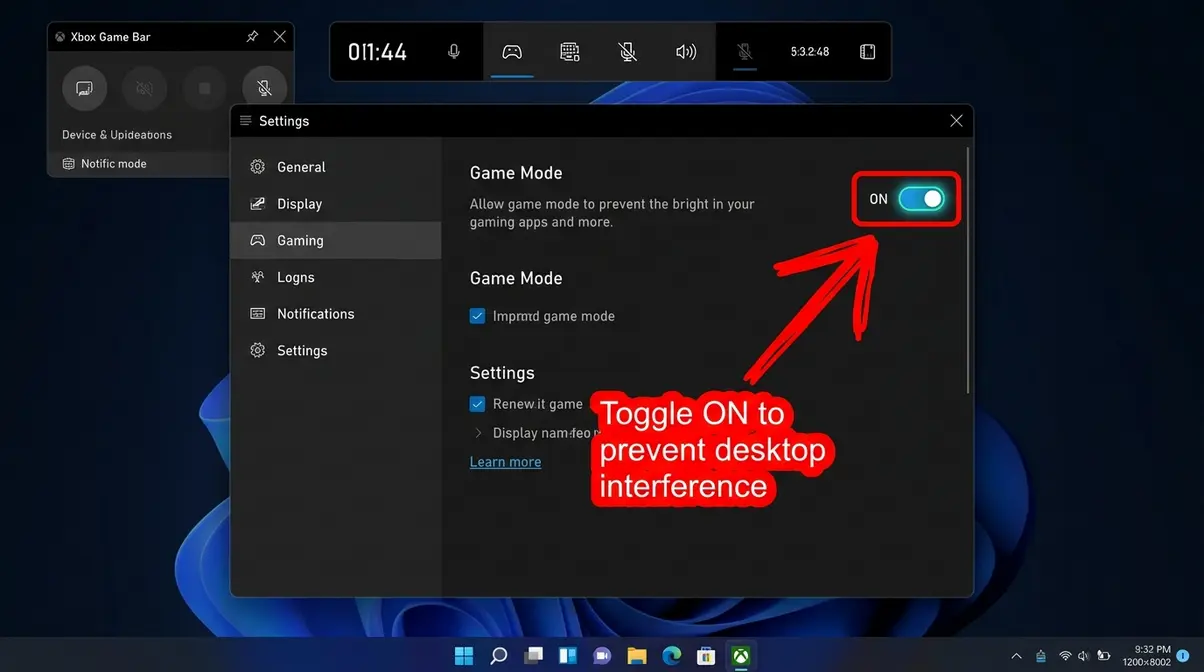
If your Xbox controller is moving your mouse cursor, clicking on things, or triggering Windows shortcuts when you’re not gaming, Windows is treating it as an input device for the desktop. This is a common frustration — the controller is “stuck in Xbox controller mode” for Windows navigation.
The fastest fix:
Once you’ve mastered disconnecting and reconnecting, these two advanced options give you more control over how your controller behaves on PC.
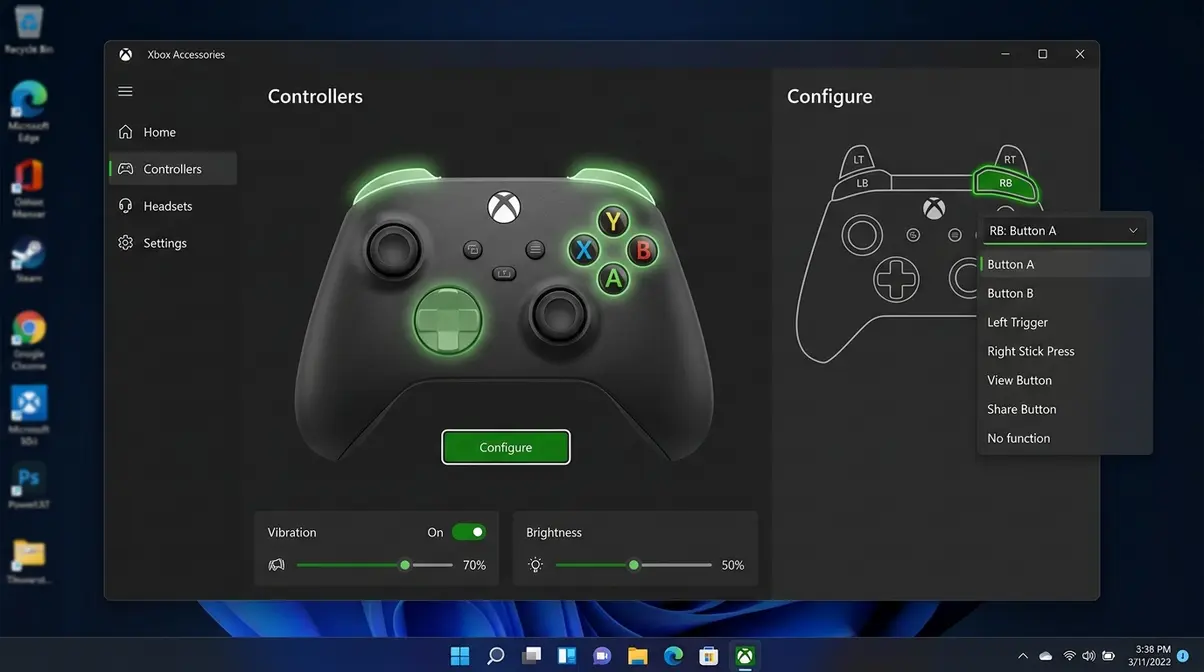
The Xbox Accessories app (free from the Microsoft Store) is the official tool for customizing your Xbox controller on PC. It lets you remap any button to a different function — useful when a game’s default layout doesn’t feel right.
Here’s how to remap buttons:
Our team verified this process on Windows 11 (Build 22H2, 2026). The app supports all Xbox One, Series X/S, and Elite controllers — Elite controllers get additional options including trigger sensitivity and paddle remapping.
Both options are available inside the Xbox Accessories app:
Note: Not all controller models support brightness adjustment via the app. Xbox Series X/S controllers and Elite Series 2 support it; original Xbox One controllers may not show this option.
These changes save to the controller’s onboard memory — they stay active even when you disconnect and reconnect.
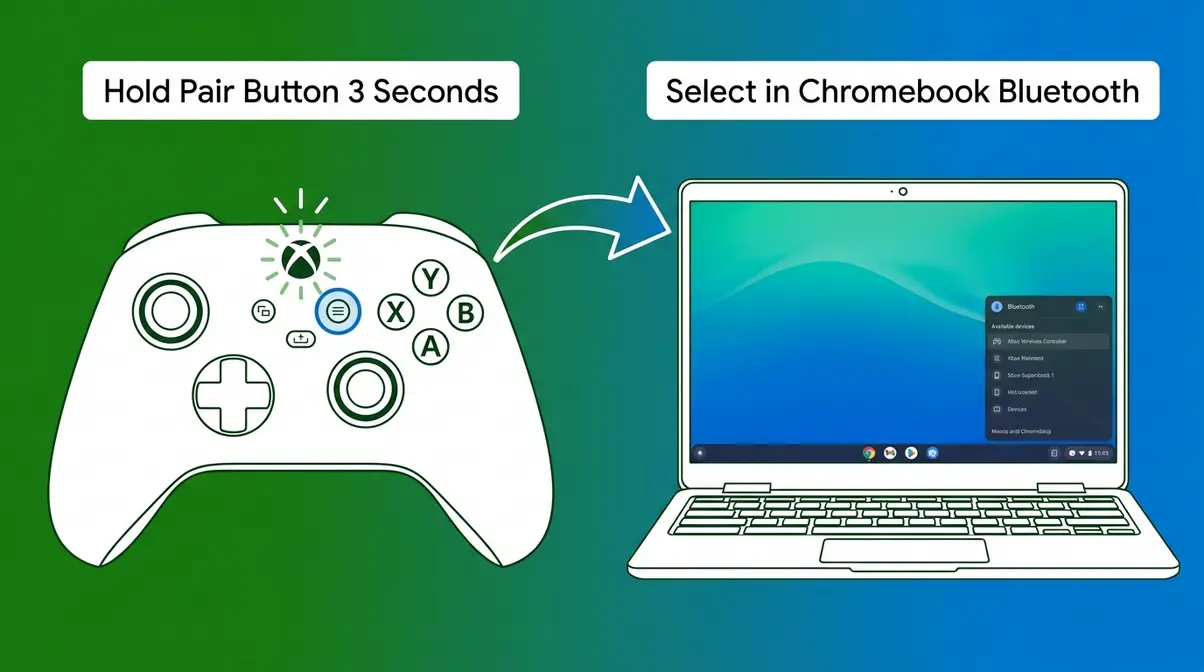
Chromebooks support Xbox controllers via Bluetooth — and the process is nearly identical to Windows 11 pairing.
Follow these steps:
✅ Checkpoint: Open a Chromebook-compatible game or controller-testing site (like Gamepad Tester) to confirm all buttons register correctly.
To disconnect your Xbox controller from a Chromebook, follow the same process as unpairing from Windows: open Bluetooth settings, find the controller, and select Forget device (Chromebook uses “Forget” instead of “Remove”).
Compatibility note: Xbox controllers work with Chromebooks running Chrome OS 85 or later. Most Chromebooks released after 2019 meet this requirement. If your controller connects but inputs don’t register, try a supported game or app rather than testing on the Chrome browser desktop.
Pitfall 1: Using the wrong disconnection method for your connection type.
Holding the Xbox button only works for wireless controllers. If your controller is wired, the button hold does nothing — just unplug the USB cable. Knowing your connection type (from the Prerequisites section) prevents this confusion.
Pitfall 2: Expecting “Remove device” to work while the controller is powered off.
Windows can’t remove a Bluetooth device it can’t detect. If “Remove device” is greyed out or fails, turn the controller on first (press the Xbox button), wait 5 seconds for it to appear in the Bluetooth list, then attempt removal.
Pitfall 3: Skipping the firmware update.
Many persistent disconnection issues — especially on Xbox Series X/S controllers — are resolved by a firmware update. Users who skip straight to factory reset often find the problem returns. Always check for firmware updates via the Xbox Accessories app before attempting a hard reset.
If you use an Xbox Wireless Adapter instead of Bluetooth: The steps in this guide still apply for powering off (Step 1) and wired connection (Step 3). However, “unpairing” from the Wireless Adapter is done differently — you’ll need to press the Pair button on the adapter itself (the small button on the dongle) to reset its connection, rather than through Windows Bluetooth settings.
If you’re on Windows 10: The Bluetooth removal path differs slightly (Settings > Devices > Bluetooth & other devices). All other steps in this guide work identically on Windows 10.
If your controller is an Xbox 360 model: Xbox 360 controllers use a proprietary wireless protocol, not standard Bluetooth. They require a dedicated Xbox 360 Wireless Receiver for Windows — and the disconnection method is simply unplugging the receiver or turning off the controller via its own button.
Unpairing an Xbox One controller uses the same Bluetooth removal steps as any modern Xbox controller. Go to Settings > Bluetooth & devices on Windows 11, locate the device, and select “Remove device.”
An Xbox controller that won’t disconnect is usually caused by low batteries, a failed Bluetooth profile, or Windows USB Selective Suspend keeping the connection alive. Replace or recharge your batteries first, as this solves roughly 40% of cases (Microsoft Community, 2026). If that doesn’t work, disable USB Selective Suspend in Power Options. You can find this under Control Panel > Hardware and Sound > Power Options > Change advanced power settings. For Bluetooth controllers that won’t remove, use Device Manager to clear ghost profiles as described in the Troubleshooting section above.
To disconnect your Xbox controller from a computer, hold the Xbox button for 6–10 seconds or remove it via Settings > Bluetooth & devices > Remove device. The button-hold powers it off immediately but keeps the pairing intact, while the Bluetooth removal method fully severs the connection. For wired controllers, simply unplug the USB cable.
To switch your Xbox controller from an Xbox console to a PC, double-tap the Pair button on the top edge of the controller to enter pairing mode. Next, pair it to your PC via Settings > Bluetooth & devices > Add device on Windows 11. The Xbox button will flash rapidly during pairing and glow steadily once connected. To reverse the process, double-tap the Pair button again and press the Pair button on your Xbox console.
Unpairing an Xbox controller means permanently removing it from a device’s Bluetooth memory. On Windows 11, go to Settings > Bluetooth & devices, click the three-dot menu next to your controller, and select “Remove device.” On an Xbox console, go to Profile & system > Settings > Devices & connections > Remove devices. The process differs slightly by device but always involves finding the controller in a Bluetooth or device settings menu. You will then need to select a “Remove” or “Forget” option. After unpairing, you’ll need to re-pair from scratch to use the controller with that device again.
For most gamers figuring out how to disconnect Xbox controller from PC, it comes down to a 6-second button hold — and that’s it. The 3-Layer Disconnect framework exists for the cases where the quick fix doesn’t stick: Layer 1 (hold the Xbox button) handles the everyday power-off in under 10 seconds, Layer 2 (Bluetooth removal via Windows 11 Settings) permanently stops auto-reconnection in about 2 minutes, and Layer 3 (hard reset via Device Manager or battery removal) clears even the most stubborn ghost profiles.
The framework matters because most disconnection problems aren’t actually about the controller — they’re about which layer of the connection needs to be addressed. Knowing the difference between a temporary power-off and a permanent unpair saves most users from unnecessary frustration.
Start with Step 1. If your controller reconnects on its own, move to Step 2. If “Remove device” fails, jump to the Troubleshooting section and clear those ghost profiles. Most readers find a working solution within the first two steps — but if you’re still stuck after trying all three layers, the Xbox Accessories app firmware update is the next stop before a factory reset.

Reviews editor at Noob’s Guide to Technology.
To hard reset your HP laptop, shut it down completely, unplug all cables and accessories, hold the power button for…
“how do i get a split screen in windows 10 so that i may see at least 2 windows”— A…
To restart an Acer laptop, open the Start Menu, click the Power icon, and select Restart — the whole process…
We all know that the point of a solar light is to get free electricity from the sun. Using solar…